According to Ubisoft, the steps below may also help for error codes 6-0x00001000 and 2-0x0000D0012.
Critically important before you proceed is that I can’t give you a guarantee that these steps will solve your problem for you, just that they’ve helped some people. These steps are also meant for Windows (i.e. PC), but I’ve heard that you can access similar settings on PS4 and Xbox One.
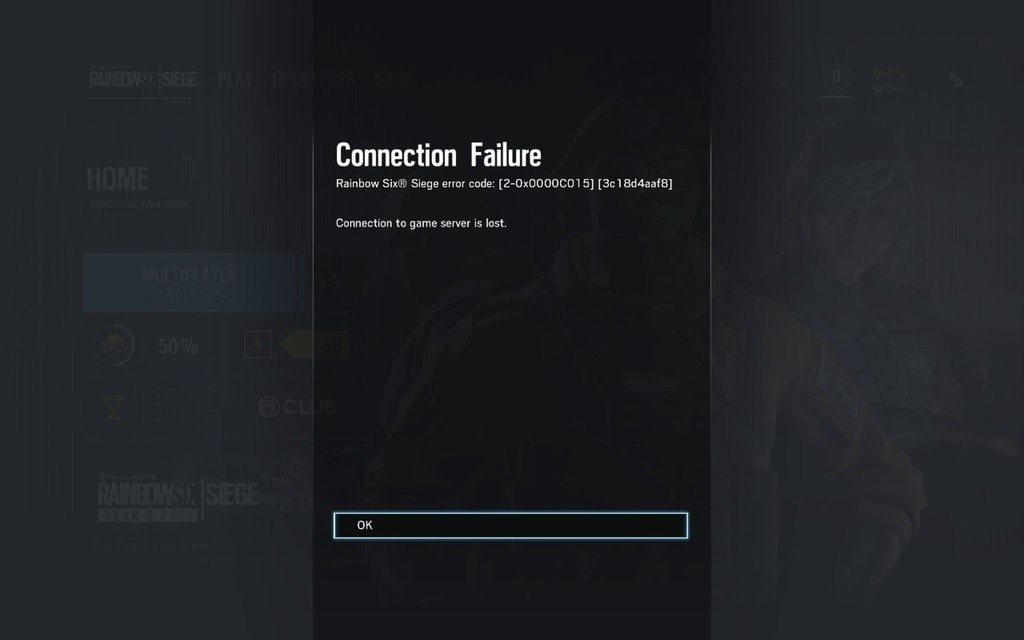
First up, Ubisoft has a set of steps you can take to try to fix connectivity problems in general. Articles by platform (each link is en-US):
- PC Connectivity Troubleshooting
- PS4 Connectivity Troubleshooting
- Xbox One Connectivity Troubleshooting
If you solve the issue using the steps on those articles – great! You don’t need to do anything else.
If you’re still having trouble after following the steps in the articles above, you can try switching DNS servers. Again: this is not guaranteed to solve your issue, but it’s worked for some people and carries minimal downside or risk, so it’s probably worth a shot.
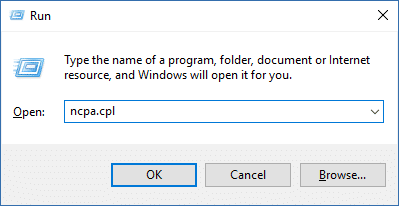
- Press Windows key + R on your keyboard. This will open up the “Run” window.

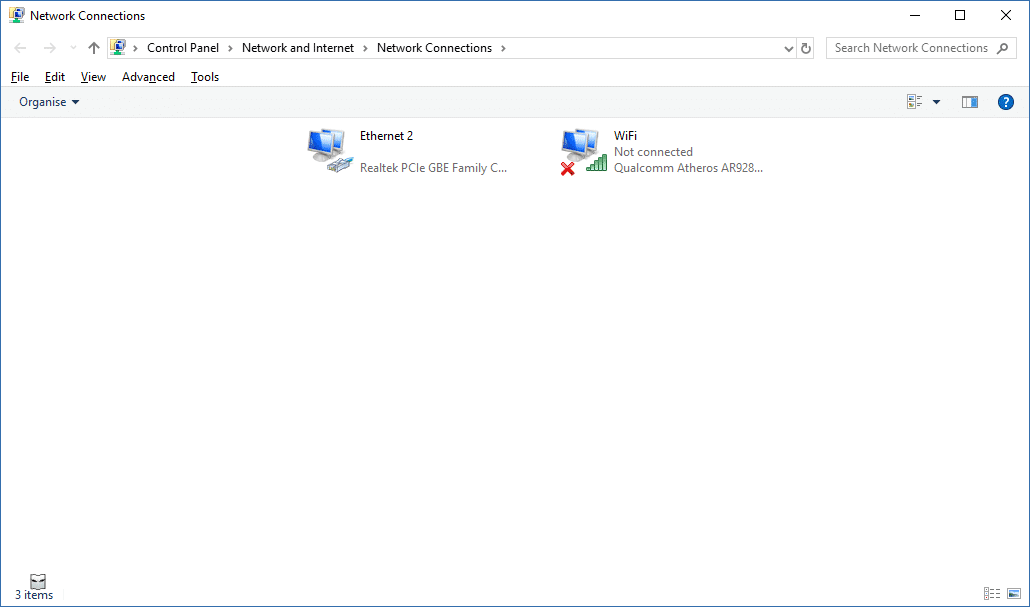
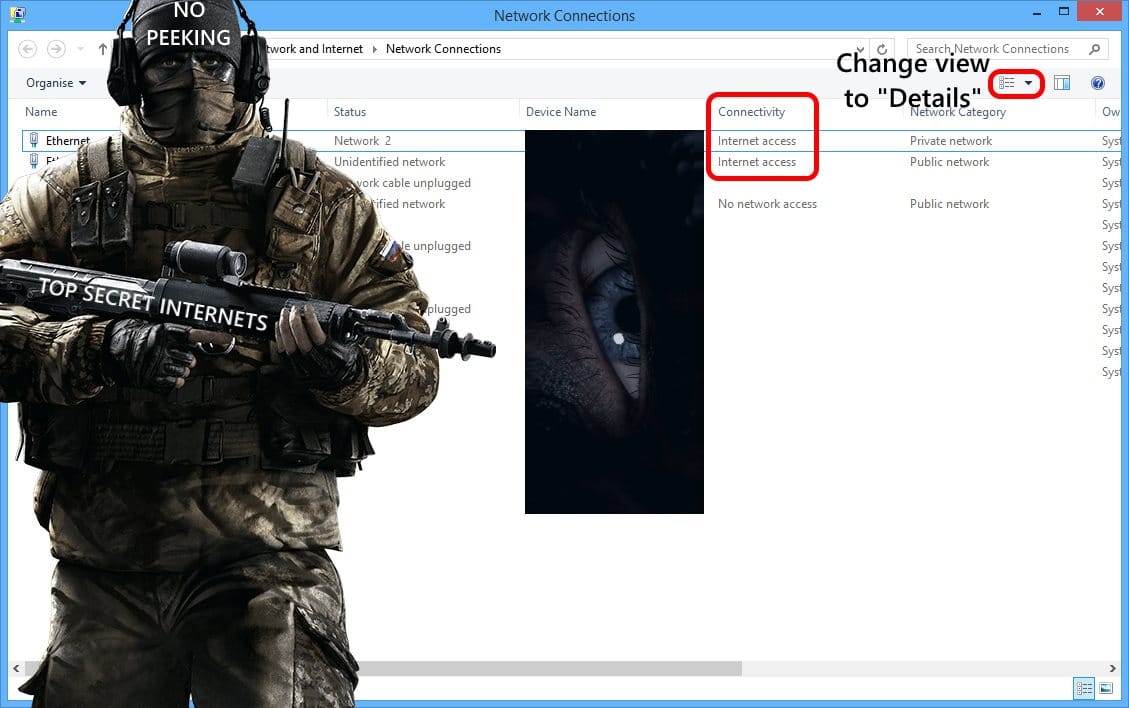
- Type in “ncpa.cpl” into the box (as shown above) and then press Enter on your keyboard. This will open up a new window that should look something like the screenshot below.1

- Locate the connection which you are using whenever you play Siege. For example, you might have a laptop with both a wireless and wired connection, but if you only ever play Siege while on the wired connection, then you only need to worry about that connection right now. If you’re not sure which of the connections displayed you usually use, switch this window’s view to Details, and then narrow your search to any connection with Internet Access listed under the Connectivity column.

If you’re still unsure, you can right-click on each of those with Internet Access and click on Status. Look towards the bottom underneath the “Activity” section where there are a bunch of numbers. Whichever connection has the biggest numbers here is probably the connection you use most.

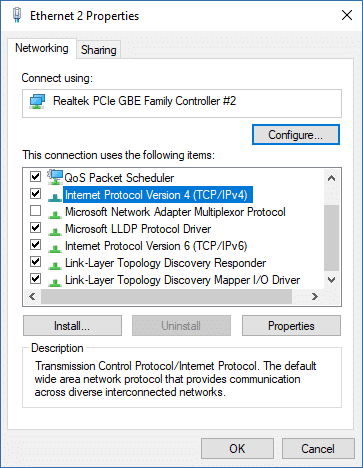
- Once you’ve located the correct connection, right-click on it and select Properties.
- From here, locate and select Internet Protocol Version 4 (TCP/IPv4) from the list, then press the Properties button in the lower half of the screen. Don’t worry about IPv6 or anything else in the list.

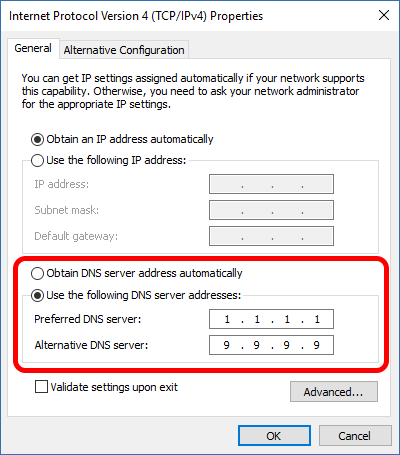
- On the bottom half of the TCP/IPv4 Properties window, you most likely have “Obtain DNS server address automatically” selected. If this is the case, instead select “Use the following DNS server addresses”. If you already have DNS servers manually specified, copy down the numbers listed so that if you have any problems you can easily undo any changes you’re about to make.

- For the Preferred DNS server, put 1.1.1.1. For the Alternative DNS server, put 9.9.9.9 (the dots between the numbers are already present, so you don’t have to actually type those when entering the numbers).2 Press OK to close the window, and do so on the previous window as well.

- That’s it! These changes should take effect immediately. Check that you still have a working connection by visiting some websites – if they fail to load, double-check that you’ve followed the steps correctly. Even in the worst case scenario you can undo any of the changes you’ve made easily and try a different solution.
If everything goes to plan, you should be able to play Siege smoothly now!
I don’t have a PS4 or Xbox One to test this process on, so I unfortunately can’t outline a step-by-step guide for those platforms. If you want to do this on one of those consoles, try searching online for “change DNS <your console>”.
If these steps don’t fix the problem for you, feel free to let me know and give others other solutions in the comments, but I can’t provide tech support. If you need that, contact Ubisoft Support.
- This method has the same result as opening Control Panel and navigating there manually.
- There are plenty of other DNS servers you could use here. I’ve chosen these two in this example because the numbers are easy to remember, and the DNS services are large, robust, fast, and more privacy-respecting than the commonly-used Google DNS. If you want to find out more about each of these two DNS providers check out https://1.1.1.1 and https://quad9.net respectively. I’ve used two different DNS providers in the odd event that one provider has an issue.


Doesn’t work for me unfortunately.
Sorry to hear. Stuff like this unfortunately has many causes, so if you find something that works for your specific situation feel free to come back and let me know! For stuff that’s mentioned often I can add it into the article.
Same
Yeah, unfortunately there are a lot of reasons that can cause this error, and changing DNS only addresses one of those 🙁
it might be that your fire wall is denying access to the ports r6 uses…
That is one of many possible explanations, but since it’s explicitly addressed in the ubisoft article linked before the steps, I didn’t waste the words repeating that information.
This guide fucked up my computer
The scope of what it does is *extremely* limited and I have strong doubts that you could “fuck up your computer” by carefully following the steps. However if you did run into any problems while changing your DNS it’s very easy to revert the settings and everything will be back to the way it was before.