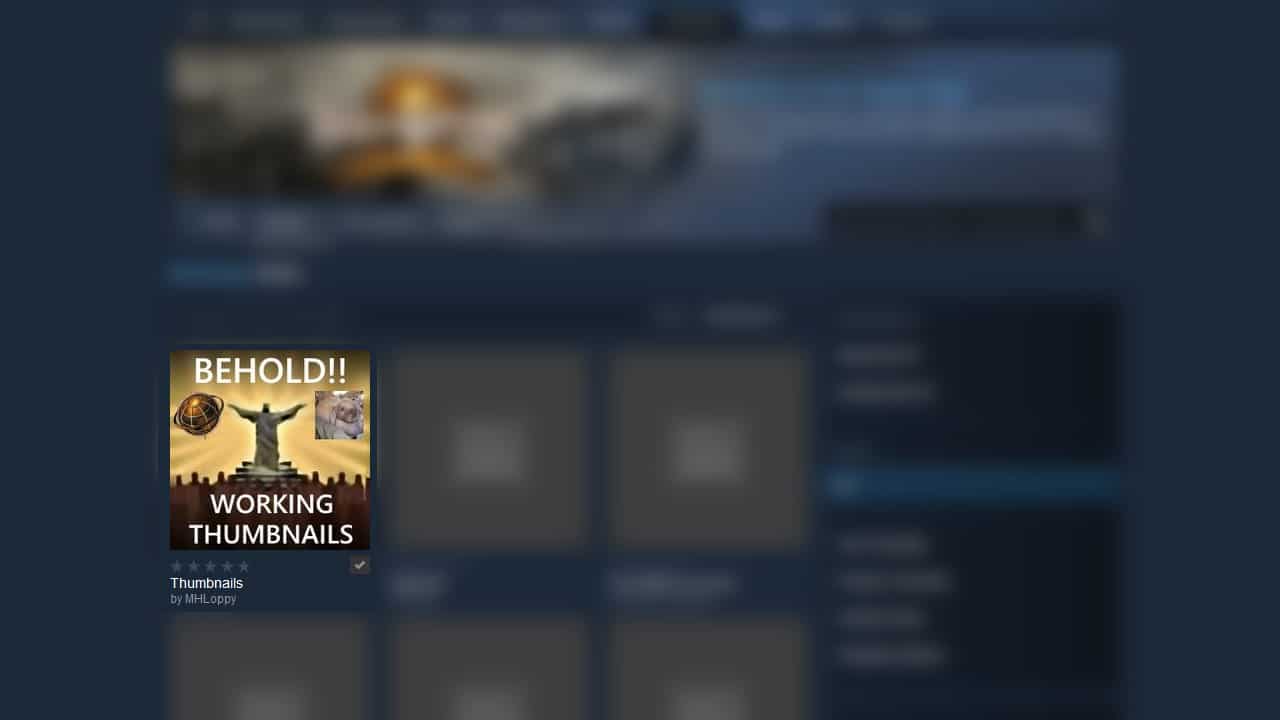
If you’ve ever tried to browse the Steam Workshop for Rise of Nations, you may have been frustrated at how none of the entries appear to have thumbnails. I looked into this and it appears that this is because the native mod uploader does not support thumbnails.
Nonetheless, by using a workaround, last night I became probably the first person to ever have a thumbnail for my RoN mod on the Steam Workshop. Here’s how I did it.
First, the usual disclaimers to outline the scope of what I can and cannot help you with here:
- This is not intended to be a tutorial on how to upload a mod itself to the Steam workshop, for RoN or any other game.
- The method used works as of publication date – this does not guarantee it will work by the time you read the article.
- It is assumed for this article that you’re on a modern version of Windows – older versions and Linux users: good luck.
- My investigation into this was the first time I’ve ever made a RoN mod, and the first time I’ve ever uploaded something to the Steam Workshop, and the first time I’ve ever used multiple things in the method outlined later. This means I cannot reasonably be considered an expert on any of these things.
This guide is also available in video form, but please note I have no plans to upload a new video each time any part of this process breaks, as I will instead just update this article; please refer to the video primarily as a visual aid.
Phew. Now that we have that out of the way..
As a prerequisite, you will need a mod already on the Steam Workshop. I’m showing you how to add a thumbnail to an existing Workshop item, and this method won’t work unless you have one.
Since the native method of uploading RoN mods does not support the inclusion of thumbnails (but the Workshop itself does), we’re going to have to upload the thumbnail via other means.
First, download SteamCMD, a utility provided by Valve for developers.1 Unzip the .exe into its own folder – this new folder is about to become the installation location of SteamCMD.
This next step may be partially unnecessary, but without uninstalling it all and repeating the process, I can’t know for sure, so I am suggesting the full process.2
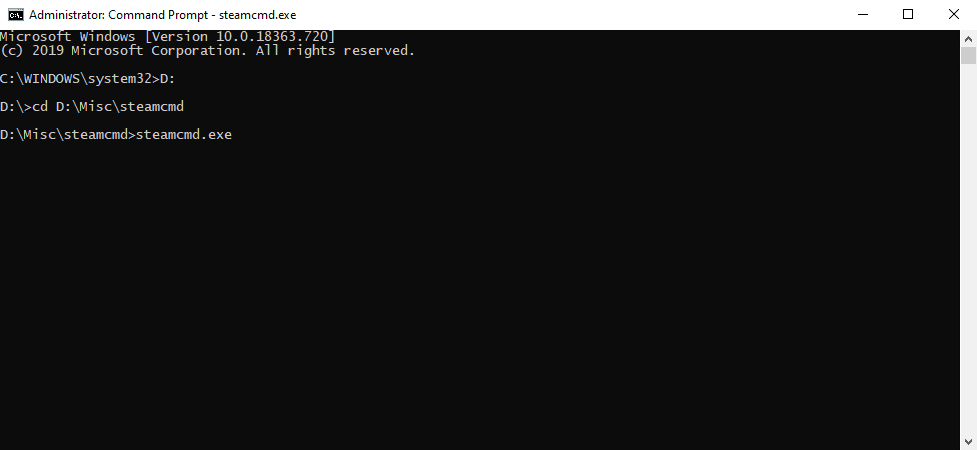
Open up Command Prompt (I ran command Prompt as admin, but I don’t know if that’s required or not unless you’re in a privileged folder),3 and navigate to the folder you just unzipped steamcmd.exe to. In my case this is D:\Misc\steamcmd
Update: Although I can’t verify whether needed for the initial install process, I was able to update the example thumbnail with Command Prompt not running as admin.
TIP: You can change drive letters from C: to D: (or whichever other drive) by just typing the drive letter (e.g. “D:” without quotes), and then use “cd <path>” (no quotes, replace path with e.g. D:\Misc\steamcmd) to change directory to that location.
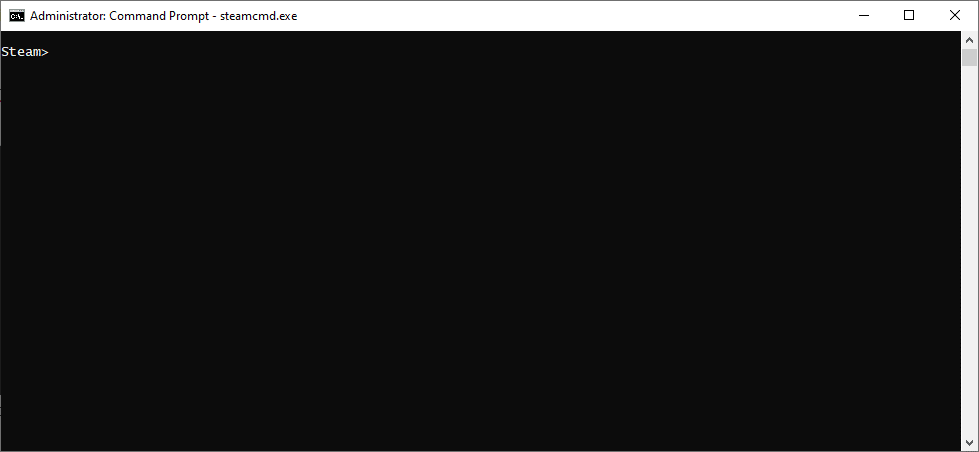
From Command Prompt, run steamcmd.exe.
Doing this will cause it to download and install a bunch of files, and the progress will be tracked in the Command Prompt window.
Once it’s completed, you should end up with a Steam> prompt, as you are now running SteamCMD from Command Prompt.
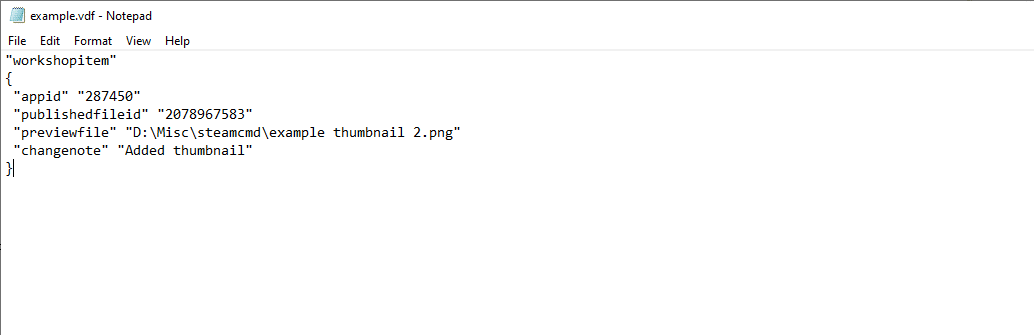
Next, follow Valve’s directions to create and upload a VDF file. This will involve:
- Creating a blank .txt file (outside of Command Prompt) in the same folder as SteamCMD
- Putting specifically formatted text inside the file, as shown by Valve
- Changing the file (by simple renaming, with file extensions enabled in Explorer) from a .txt file to a .vdf file
Please note that within this file, do not remove the quotes unless also removing the text inside of them. They are an essential part of the file’s formatting.
Below I’ve outlined each of the values in the VDF file. Note that some of these are mandatory and some are optional. For lines such as description, removing these from the VDF file will simply keep whatever description already exists for the mod on the Workshop. If you keep lines like this, the new values will replace existing entries.
- For
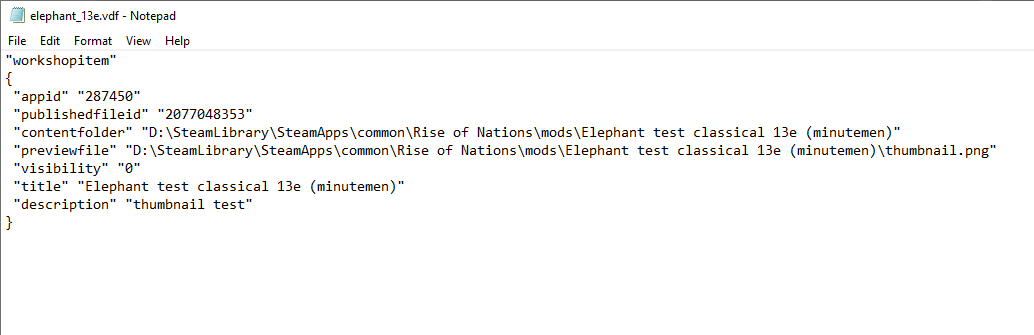
appid, you will need to change “480” to the id of the game your mod has been uploaded for. In RoN’s case this is “287450” – in case you need to use this guide for a different game, this value can be found using the game’s Steam store page URL or Workshop page. This field is mandatory. - For
publishedfileid, change it to the ID for your mod – as above, this value can also be found by going to your mod’s workshop page and looking at the numbers at the end of the URL. This field is mandatory. contentfolderwill need to be the local file path to your mod. For example, this could beD:\SteamLibrary\SteamApps\common\Rise of Nations\mods\Elephant test classical 13e (minutemen). For this and the next field, you may or may not need to use double backslashes (e.g. D:\\Thumbnails\\thumbnail.jpg) – the documentation suggests that you do, but things worked fine for me with just single backslashes. YMMV. For our purposes, this field is not required.previewfileis the thumbnail for your mod. As far as I know, the file can be a png, a jpg, or even an animated gif file. Just make sure the file isn’t too large (I suggest definitely under 1MB max, but ideally well under 500KB), and remember that the preview on the Workshop is a square, so you may want to crop your thumbnail down to a square if it isn’t one already. I don’t know if there’s a resolution limit, but I suggest a max of 512×512 or thereabouts unless you have a specific reason to want a higher resolution, since people will only see an image of 200×200 when browsing mods, and slightly higher than that when on the page for the mod itself. This is the thumbnail file, so is mandatory for our purposes (but otherwise optional if you’re not adding a thumbnail). [update 2025: Steam actually has an annoying thing where if it features your mod it shows users a 435×435 image, but internally requests a 512×512 version of it when doing so. If the image can’t match that size then it letterboxes it with black borders, so I actually recommend a minimum of 512×512, though I still wouldn’t recommend using an enormous resolution. One random aside is that the size of the thumbnail dictates how much space linking it takes in Steam chat, which may or may not be that relevant depending on whether your game has a multiplayer scene that tends to chat and link things in Steam chat.]visibilityis the visibility setting of your mod. 0 is public, and I believe 1 is friends only, and 2 is hidden. I’m not sure if you can select “unlisted” with this field via this method, but you could try setting it to “3” and letting us know what happens. Remember you can always change this later via the Workshop itself. For us this field is not required.titleis self explanatory. If your title here does not exactly match the existing title on the Workshop, this will become the new title. For us this field is not required.descriptionis the mod’s description on the Steam Workshop, and will override any description you have already written for the mod if included. For us this field is not required.changenoteis the change note that will be visible on the Workshop for this “new” version of the mod. If you only change a mod’s metadata (not the mod data itself), then the change will not be considered a new version and this field will be ignored. For us this field is not required.
Save the file, then change it from a .txt file to a .vdf file if you didn’t already do so (you’ll need to have file extensions enabled to see the file type).
Hop back over to SteamCMD and login, replacing the below with your username, password, and Steam Guard 2FA code if you have it (if you’re not using Steam Guard, ignore the part at the end)
login USERNAME PASSWORD XXXXX
Doing this will sometimes log you out of normal Steam if it’s running. I don’t know why it’s inconsistent, just be aware that it can happen.
Now we can upload it using the below command, replacing FILENAME with the name of your own VDF file. We’re assuming your VDF file is located in your SteamCMD directory.
workshop_build_item FILENAME.vdf
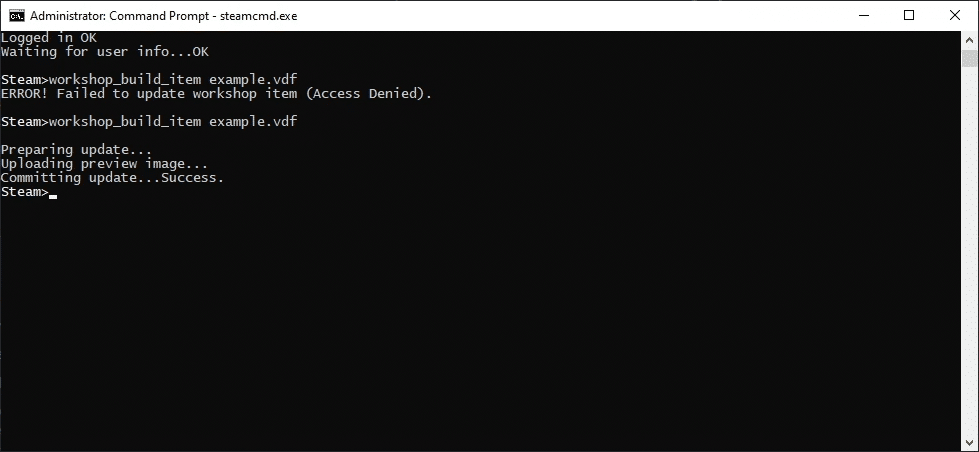
Update: For VDF files that include spaces in the file name or file path, surrounding the whole file path in double quotes may be needed.
At this point, your mod should now have a thumbnail, congratulations! Check your mod on the Steam Workshop to verify that everything worked as expected and that the thumbnail is correctly displaying.
To exit out of SteamCMD, use the quit command. After it’s exited you can close the Command Prompt window.
Shoutouts
I’d like to make a special shoutout to Roxette on the Keen Software House forum for being a goldmine of information for this article – most of the steps I’ve listed are simply adapted from information they provided for a different game.
After knowing that SteamCMD was a critical ingredient in the thumbnail recipe, I also found guides from [OS] Janine and xdshot covering the same topic. Should this guide ever fall into disrepair, those resources may be of use.
- Here is the direct download link if that page gets updated but this page doesn’t: https://steamcdn-a.akamaihd.net/client/installer/steamcmd.zip
- You may be able to simply run steamcmd.exe directly from that folder instead of doing so via cmd – it appears to work for me after installing it, but it may not work before.
- Powershell probably works too, but again, haven’t tested it.