Uploading good quality unedited game recordings to YouTube is, all things considered, not too complicated of a process. It’s mostly just optimising based on what kind of resources you have available to you, such as how powerful your CPU is, how fast your internet connection is, and how much storage space you’re willing to use up.
Streaming is much the same, although your expected quality bar will of course be lower because your viewers have to keep up with the incoming video in real-time, and you yourself have to encode that video in real-time as well.
The process is a little different if you’re making clips for Gfycat – at least if you want them to still look great once they’re there.

Update May 2020: An earlier version of this article provided a slightly incorrect description of the -c parameter in FFmpeg – this has since been updated (the command usage itself has not changed). Additionally, it’s now explicitly pointed out that the full FFmpeg instruction we’re using will just have the default audio bitrate set.
YouTube and Gfycat: different approaches to serving video
When you upload a video to YouTube it is always re-encoded, and then that re-encoded video is served to users.1 The original is still stored on YouTube’s servers somewhere,2 but the viewer never actually sees it.
This means that for optimal quality you generally want to provide a really high quality file if you can, as you don’t have to worry about the file being too large for viewers – only you and YouTube need to worry about that part. YouTube will then take the file you give it and use a standardised processing method to give viewers a reasonable quality, easy-to-serve video. It won’t look or sound quite as good as the original thing you uploaded, but if you fed YouTube a good quality video to begin with, then for most things the re-encoded version will be squarely in “good enough” territory.
Gfycat has the option to work a little differently, which is the reason it’s currently my preferred place for uploading misc short clips. Instead of re-encoding everything like YouTube does, Gfycat re-encodes some types of uploads, but will leave others in their original quality depending on how the video that you upload was encoded.
YouTube
As mentioned previously, YouTube always re-encodes videos you upload to it, even if you follow their recommended upload settings. There are some things you can do to make your video look better before it’s uploaded (so there’s more to work with when it’s re-encoded), and there are also some tricks (some might say “hacks1!1!!!”) you can use to sometimes improve the quality once it’s on YouTube, but you have limited control over what the final product is. I’m not going to go over what those are here, and 95% of both have been beaten to death by “Best/Ultimate/My OBS settings!11!1!” and “Best/Ultimate/My render/upload/export settings!!11!” videos and articles.
I will throw a quick word of caution about following someone else’s setting recommendations though: many of these videos / articles are out of date (so may be providing suboptimal settings for people without time machines), and many of them are also made by people who really don’t actually know what they’re doing (which isn’t a problem in itself), but who didn’t go to the trouble of testing what was best either (which makes it a problem). Just be cautious and try to learn some of the basics yourself so you can filter out the bad advice more easily – because there is quite a lot of it.
Gfycat
Let’s swap back over to Gfycat, which re-encodes videos into a couple of different formats – the one we’re interested in today is the WebM files it makes. This is the video it spits out to you when HD is toggled on.
It appears that these files still use VP8 for their video codec, probably for compatibility reasons as more devices support VP8 than the newer (and superior) VP9 codec. Since VP8 isn’t as good as VP9, using it means the final product looks noticeably worse: less detail, and more blocky and pixelated even at the same bitrate as a VP9 video.
Here’s the main thing you need to know: if you upload WebM files to Gfycat using VP8 or VP9, Gfycat will (for users viewing with HD toggled on) serve the original file you uploaded, and no re-encode them.3
Thanks for coming to my TED talk.
Here’s an example of an otherwise identical clip where the first is uploaded without converting it to VP9 first, and the second has been converted VP9 before uploading.
For reference:
- The original file (not linked here) is 60.2MB
- The VP8 re-encode (by Gfycat) is 17.7MB
- The VP9 encode at crf 30 (by me) is 28.3MB
This example doesn’t mean that the VP9 file must always be bigger, as it depends on the contents of the video itself as well as what your CRF setting is. Remember that VP9 is basically just more efficient version of VP8, so even if you match the file size between the two, a VP9 re-encode will look better than a VP8 re-encode!
Converting to WebM/VP9 files
So long as the people accessing your clip have a vaguely modern device (so that VP9 is supported) and vaguely-decent internet (so that they can use the HD toggle),4 it’s highly preferable to convert a file to a WebM using VP9 before sending it to Gfycat.
To re-encode the video files we’ll be using FFmpeg, a free and widely used program that converts between common multimedia formats. FFmpeg itself doesn’t have a normal interface where you click on buttons and stuff (GUI) – it’s only a command-line based tool (CLI). If you absolutely can’t deal with that, no worries, I’ve been there. For everyone else willing to give it a shot I’ll help run you through the steps of what you need to do.
Installing FFmpeg
First you’ll need to download and install FFmpeg, then do a quick configuration step before you’ll be able to use it. Windows 10 users can follow this wikiHow guide to do so, and Windows 7/8/8.1/10 users can also use this WindowsLoop guide. MacOS and Linux users can check out some of the guides linked here.
Note that for the remainder of this article I’m now assuming you’re a Windows user when saying things like “Command Prompt”, but will make note of when the command you enter needs to be different if you’re on macOS or Linux.
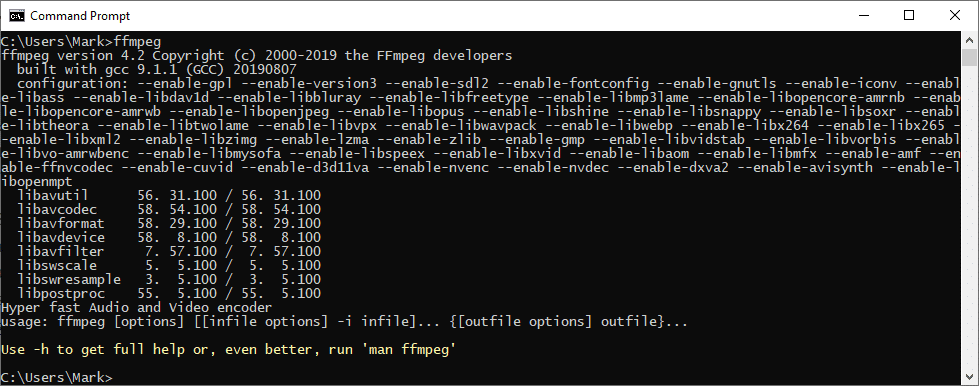
Once FFmpeg is installed and configured, you should be ready to use it in the command line. If you haven’t already done so, it’s a good idea to test that it’s installed correctly. Open up Command Prompt and type “ffmpeg” (without the quotes) and press enter. You should get a few lines telling you about the version that you have installed. If you don’t, then something isn’t quite right with how it’s been installed or configured.
Using FFmpeg to convert videos
Now comes the actually useful part of the article. The steps I’m going to run you through here are actually outlined in FFmpeg’s documentation, but it seems to assume you have a decent understanding of FFmpeg already – otherwise you have to sift through quite a bit of documentation to figure out what everything means. I’ll be breaking down what each part of the command means so you actually know what you’re doing instead of copying a command and blindly hoping it works ::fingerguns::
First you’ll need the filepath of your starting video. That path might look like D:\Videos\Leona video.mp4. Keep this path handy, as you’ll need it soon.
In Command Prompt, start off by typing ffmpeg. This is just saying to use ffmpeg to do all the commands afterwards, as otherwise you would be telling command prompt itself to run the commands (which won’t work).
Note that we’re not running this command yet – you only need to run the full command, not each individual section. I’m just showing you each individual part so you know what it all does.
ffmpeg
We’ll then tell FFmpeg what video we want converted by using -i input.mp4, but replace “input.mp4” with the filepath for your video. If any part of your file path contains a space (such as “Leona video”), you’ll need to put quotes around the file path.
ffmpeg -i “D:\Videos\Leona video.mp4”
Next we’ll specify the video codec starting with -c:v ,(codec: video) then specifying that we want to use libvpx-vp9 (put simply, this says to use the VP9 encoder).
ffmpeg -i “D:\Videos\Leona video.mp4” -c:v libvpx-vp9
Then we need to specify what we want the quality of the converted video to be. There’s more than one method of doing this such as specifying target bitrate (CBR), specifying target quality via constant rate factor (CRF), and specifying target file size. To ensure best quality (without going too crazy on the bitrate), I recommend targeting for quality rather than bitrate or file size in a situation like this.
To do that use -b:v 0 -crf 30. This says to use a bitrate for the video of 0, which will tell FFmpeg to instead follow the next command dictating the quality desired – if you use any number other than 0 here you’ll end up targeting bitrate instead of quality (which we don’t want in this case!). The higher the CRF number the lower the quality is. Around 30 should look great without being excessively large.5 You can experiment with different values to see what balance of quality and file size you prefer.
ffmpeg -i “D:\Videos\Leona video.mp4” -c:v libvpx-vp9 -b:v 0 -crf 30
Unlike what you might be familiar with while using x264 (e.g. OBS, Handbrake), VP9 prefers 2-pass encoding rather than single pass encoding (you can get better quality at same file size, or smaller file size at same quality). This means doing what is essentially a quick run of the video to gather data about it, then a “real” run using that gathered data to produce a better result. To do this we’ll add -pass 1 to the command. We’ll change this later when we run the command during the second pass.
The first pass only needs to worry about video and not audio, so we can use the -an flag to specify that audio is not going to be included. We’ll change this to include audio when we do the second pass.
ffmpeg -i “D:\Videos\Leona video.mp4” -c:v libvpx-vp9 -b:v 0 -crf 30 -pass 1 -an
Nearing the end of the full command, we want to specify our output format to be WebM using -f webm.
ffmpeg -i “D:\Videos\Leona video.mp4” -c:v libvpx-vp9 -b:v 0 -crf 30 -pass 1 -an -f webm
For those CPUs that have more than 4 threads (not cores(!)), I suggest adding -row-mt 1 here, which turns on row based multithreading. This can make the encoding process significantly faster and appears to have no functional downside, as the quality of output is comparable with or without this setting enabled.
If you have a higher thread count CPU (12+ threads) and are dealing with fairly high resolution files (1080p or higher), this should reduce time taken substantially, but will likely still be of some benefit to e.g. 6-8 thread CPU users. If you don’t know how many threads your CPU has, you should be able to see it in the Performance tab of Windows Task Manager. It’ll be listed as Logical processors in the CPU section.
Users with only 4 threads probably won’t see any benefit here, and may even see slower performance if you enable it,6 so just make sure you use the right option for your system.
ffmpeg -i “D:\Videos\Leona video.mp4” -c:v libvpx-vp9 -b:v 0 -crf 30 -pass 1 -an -f webm -row-mt 1
As the last part of the first pass command, we specify that we’re actually not wanting to make a video in the first pass — we’re just helping out FFmpeg by letting it gather some data on the video — so we add NUL (if you’re on Windows) or /dev/null (if you’re not). Then we finish the command with “we have a second pass to do as well, and we’ll tell you about that in just a moment” by adding && ^ (on Windows) or && \ (if you’re not).
Windows users:
ffmpeg -i “D:\Videos\Leona video.mp4” -c:v libvpx-vp9 -b:v 0 -crf 30 -pass 1 -an -f webm -row-mt 1 NUL && ^
Non-Windows users:
ffmpeg -i “D:\Videos\Leona video.mp4” -c:v libvpx-vp9 -b:v 0 -crf 30 -pass 1 -an -f webm -row-mt 1 /dev/null && \
Now you can send the command, and FFmpeg will do its best Oliver Twist impression and give you a timid “More?”. (Unless you made a typo, in which case it might tell you that what you just asked for doesn’t make sense or can’t be done.)
Now you just have to press the up arrow on your keyboard to copy the command you just sent, and we’ll make a few changes since we’re now working on the command for the second pass.
First and most obviously, we’ll need to change -pass 1 to -pass 2.
ffmpeg -i “D:\Videos\Leona video.mp4” -c:v libvpx-vp9 -b:v 0 -crf 30 -pass 2 -an -f webm -row-mt 1 NUL && ^
If you want audio in your final video then we’ll need to swap that out as well. Instead of -an put -c:a libopus, which says for the codec for: audio we want to use libopus (which is Opus, a very cool audio codec). For our purposes the default audio bitrate will be fine.7
If you don’t need audio in the final product you can keep the -an flag in place.
ffmpeg -i “D:\Videos\Leona video.mp4” -c:v libvpx-vp9 -b:v 0 -crf 30 -pass 2 -c:a libopus -f webm -row-mt 1 NUL && ^
Finally, we’ll be replacing -f webm NUL and && ^ with the final file’s destination. Remember to use quotes if you have spaces in the file path. Also make sure you put .webm at the end of the file name instead of .mp4.
ffmpeg -i “D:\Videos\Leona video.mp4” -c:v libvpx-vp9 -b:v 0 -crf 30 -pass 2 -c:a libopus -row-mt 1 “D:\Videos\Gfycat\Leona video.webm”
Now press enter and away we go! The first pass will usually be pretty quick, while the second pass might take a bit of time. For long files you’ll probably want to do something else while it’s encoding – just be sure not to fire up anything that will compete for the CPU too much! Web browsing or watching a video should be fine, but probably best not to fire up CS:GO while it encodes.
While it goes it’ll give you some information about what it’s doing. The most interesting one is probably just the speed listed at the end. This is a multiple of real-time (1x speed). For example, 0.15 would be 15% of real-time speed. A 20 second clip encoded at 0.15x speed would take 133.3 seconds to finish, i.e. 2 minutes and 13.3 seconds.
If you do this a second time later on (even with a different file), you’ll be prompted about overwriting NUL from your previous video. Saying yes to overwrite won’t overwrite the previous video you encoded, just the data that FFmpeg gathered during its previous first pass. Give it a quick Y and it’ll get to work.
It’s not working!
I’m assuming you have successfully run the FFmpeg test command outlined earlier (just putting ffmpeg in command prompt). If that’s the case and you have problems, I can offer only limited troubleshooting beyond one big thing: every error I’ve ever encountered using this method (over like 100+ encodes) has been because of a typo on my part.
Check for misspellings, hyphens where they shouldn’t be, hyphens missing where they’re needed, and whether commands are correctly spaced between each other and not jammed together. During this article I actually had -row-mt 1 written out as -row-mt1, and only caught it by testing the finished command. Hopefully you’ll have you “aha” moment when you notice the problem.
Closing words
Hopefully you found this useful! It is in essence a major upgrade and extension of some tips I provided on more or less this subject on reddit a few years ago, except making use of VP9 for better quality / lower file sizes compared to VP8, plus having a better handle on how this stuff all works. So I guess this article’s been a long time coming.
Note that this method does require you to have the HD toggle on, or to directly link to the WebM file on Gfycat. The “SD” version of your video won’t benefit from being uploaded in VP9!
As always feel free to leave a comment or give me a yell if you have questions or feedback, but I can offer only limited troubleshooting support – particularly for anyone not on Windows 10, as I don’t have a non-10 system on hand anymore.
- As far as I’m aware there are no meaningful exceptions to this (at least not anymore), although if you find one do let me know.
- Which is how they were able to enable 60fps for old videos that were uploaded before that feature was supported – although I don’t know whether the original file is stored forever or not.
- Except to create a second, smaller file to show for users viewing with HD toggled *off*.
- Depending on the file you upload, it might not be larger than the VP8 re-encode would’ve been. In one of my tests clips I actually got both higher quality AND a smaller file size by using VP9.
- Note that the CRF values here are DIFFERENT to what you would use when encoding H.264 using x264 in e.g. OBS or Handbrake. You can’t simply copy a CRF number from there and end up with the same result here.
- I honestly don’t know what the result would be.
- If you’re doing something else other than just sharing clips you might be wanting something other than the default though.