Now that we have an idea of what each class does and the strengths of each of the two characters within those classes – let’s put that into practise by piecing together some squads.
Regardless of anything else, in a full squad you’ll usually want:
- Mob-clearing ability. If you can’t take on a swarm that’s coming at you, you’re toast. The capability to do so can come from someone who can get the job done minimal assistance (Special Weapons with Autogun / Minigun / Devastator) OR lots of squad members with reasonable combat abilities – you can simply tag team to achieve similar mob-clearing to a dedicated role.
- A medic to keep everyone healthy. Unless you’re all pros, this should realistically be considered a mandatory squad requirement. The game is many times more difficult when you can’t heal up damage or deal with parasite infections.
- A tech. Even on missions where a tech isn’t strictly mandatory, having a scanner allows you to use that information to make informed decisions – without one you’re going into each situation blind.
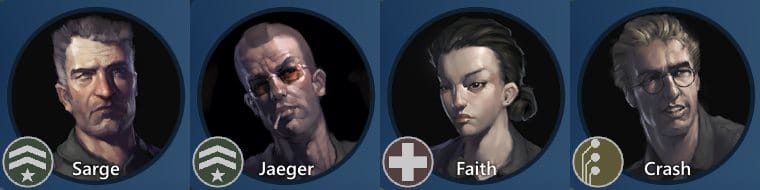
Example 1: Team Siren1
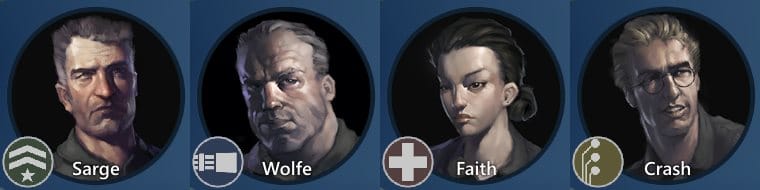
A group that stays together and fights the swarm as a unit. Sarge’s leadership and Faith’s healing prowess act as force multipliers for the squad. Wolfe with his high health pool, high Autogun Damage, and high Piercing Bullets can cover incoming threats on the group’s front side while Sarge primarily holds the rear. Faith and Crash — the two more vulnerable members of the squad — can stay safely in the middle while contributing to fights. Crash can alternate sides depending on where he’s needed, with Faith keeping everyone healthy and further assisting via utility weapons and equipment.
Example 2: Split focus
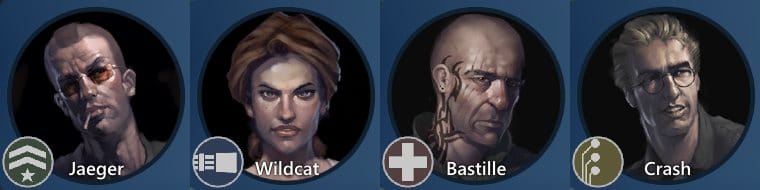
This squad is great if you want to split into two duos to tackle two objectives simultaneously. When one objective needs more firepower than the other, Jaeger and Wildcat can pair up to really bring the pain, while Bastille and Crash are able to bring enough gun to handle the smaller fight.
When each objective is similarly difficult, Jaeger and Wildcat each head up a duo, while Bastille and Crash serve as the secondary members of each pair to evenly distribute the group’s damage.
Make sure you have the Tech’s duo in the right place if there are any consoles or access panels to hack – if you have to swap places to progress, you lose much of the benefit of splitting up in the first place.
Example 3: Officer down!
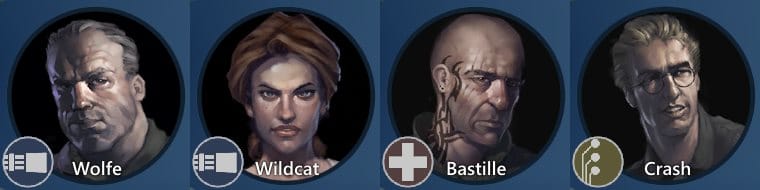
Officers aren’t strictly a squad requirement, and having two Special Weapons provides absolutely devastating combined firepower in controlled engagements. Alternatively you can split the heavy hitters to completely lock down two separate corridors.
Bringing along the more combat-orientated support roles in Bastille and Crash makes sense because you’ll tend to move around more slowly due to the heavy weapons you’re bringing to the front. You won’t be needing the support roles to be completing their tasks quickly, and doubling down on your firepower allows for a robust mirrored configuration similar to the previous squad – or a third point of power if you pair the support roles together.
Example 4: The rookie tech
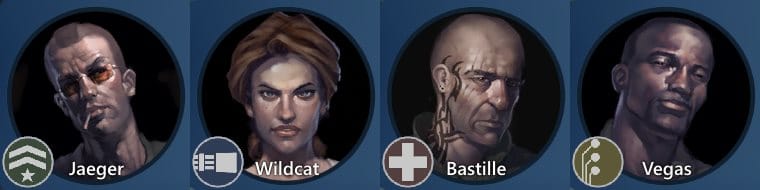
If you have three seasoned players teamed up with someone still learning the ropes, this is a great way to organise the squad. Each of the three veterans takes up a somewhat self-sufficient role, while the rookie goes onto a low-combat support role so that he isn’t a liability in fights. That’s not to say that they can’t participate in fights at all – but it’ll probably be more enjoyable for both the player and the squad if the newbie takes on less of a front-line role.
Vegas’ Health Bonus goes a long way towards keeping that player alive on missions that require a living Tech to complete, while Bastille’s Combat Drugs bonus will give extra time for any hacks to be completed by the inexperienced Tech.
Example 5: Jaegerbomb
Explosions galore! Having both Officers alongside Crash means you can really go wild with the dynamite due to everyone’s Explosives Bonus. Faith is the preferred Medic here because friendly fire and self-harm incidents are inevitably going to be commonplace if everyone follows the loadout theme.
Realistically this is not going to be a top tier composition, and you’re probably going to have many incidents of your friends blowing themselves up, and maybe even taking you along for the ride – but you’ll be having a blast.
Example 6: The three musketeers
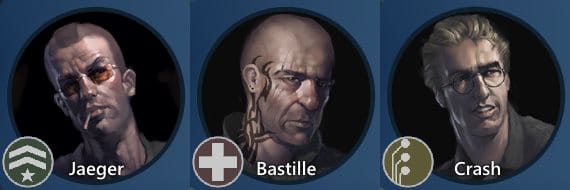
Who said you need four people to make a squad? Here you bring along Jaeger for his maxed Vindicator Damage and high Explosives Bonus, then add the support roles that can hold their own in a fight. With a man down you’ll need to play things tight since you simply don’t bring as much oomph to each engagement.
Replacing Jaeger with Wildcat would work similarly well, as she can also bring high mob-clearing to the table while being both more nimble and more flexible than Wolfe. Crash can pick up the slack on explosives if needed, or could simply double down on it with Jaeger depending on your preferences. In any case you’ll want to definitely consider an Ammo Satchel here – simple math dictates that your combined pool of ammunition is smaller than if you had a full squad.
Example 7: Speedrun special
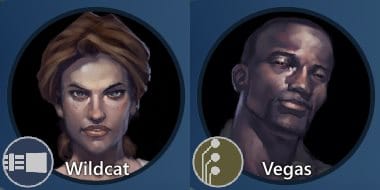
The obvious choices if you’re looking to duo-run against the clock. Wildcat’s unique combination of damage and mobility makes her the perfect choice to clear a path for Chainsaw Vegas to get to the required door or console. Jaeger with something like a Grenade Launcher wouldn’t be a bad choice either, since the fewer shots required would make up for the speed deficit compared to Wildcat.
Crash might be a required swap for Vegas if you’re struggling with limited firepower, but doing so will likely require the sacrifice of a few seconds on your time.
Next time on Dragon Ball Z
That’s the rundown for classes and characters – hopefully it’s helped you and your squad with your team compositions. Part 2 in this series is in the pipeline, and will be covering Weapons and Equipment, so stay tuned for that. Until then, happy fragging!