Michael’s Gaming PC a.k.a. The Silent Whisper (December 2016)
This build was my child, and parts-wise is tied only with my own system for how much I like it.
Build involvement:
- Component selection (lead)
- Building the system (lead)
- BIOS / drivers / software (lead/assisted)
- Tweaking (lead)
Priorities:
- Flexible ~$1500 budget
- Great gaming performance
- Great acoustics if it’s not prohibitively expensive

For the first time ever when helping with someone else’s build, I was given a license to allocate extra cash to make the system acoustics great. Unlike my own build from a few years earlier, I also didn’t have to worry about the next GPU generation being Fermi v2. This time I could really focus on making this system perform great while being genuinely SPCR-levels of quiet, which is something I’d been wanting to do for years.
The Build:
| Part | Model |
|---|---|
| CPU | Intel Core i7 6700K |
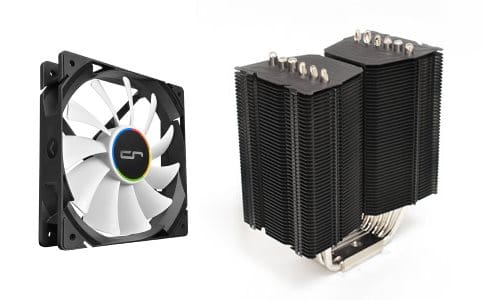
| CPU cooler | Prolimatech Black Megahalems (donated by me) |
| Motherboard | Asus Z170-AR |
| RAM | Kingston HyperX Fury 16GB (2x8GB) DDR4 2400/C15 |
| GPU | MSI GTX 1070 8GB Gaming X |
| Storage | 1x 128GB SSD (existing)* |
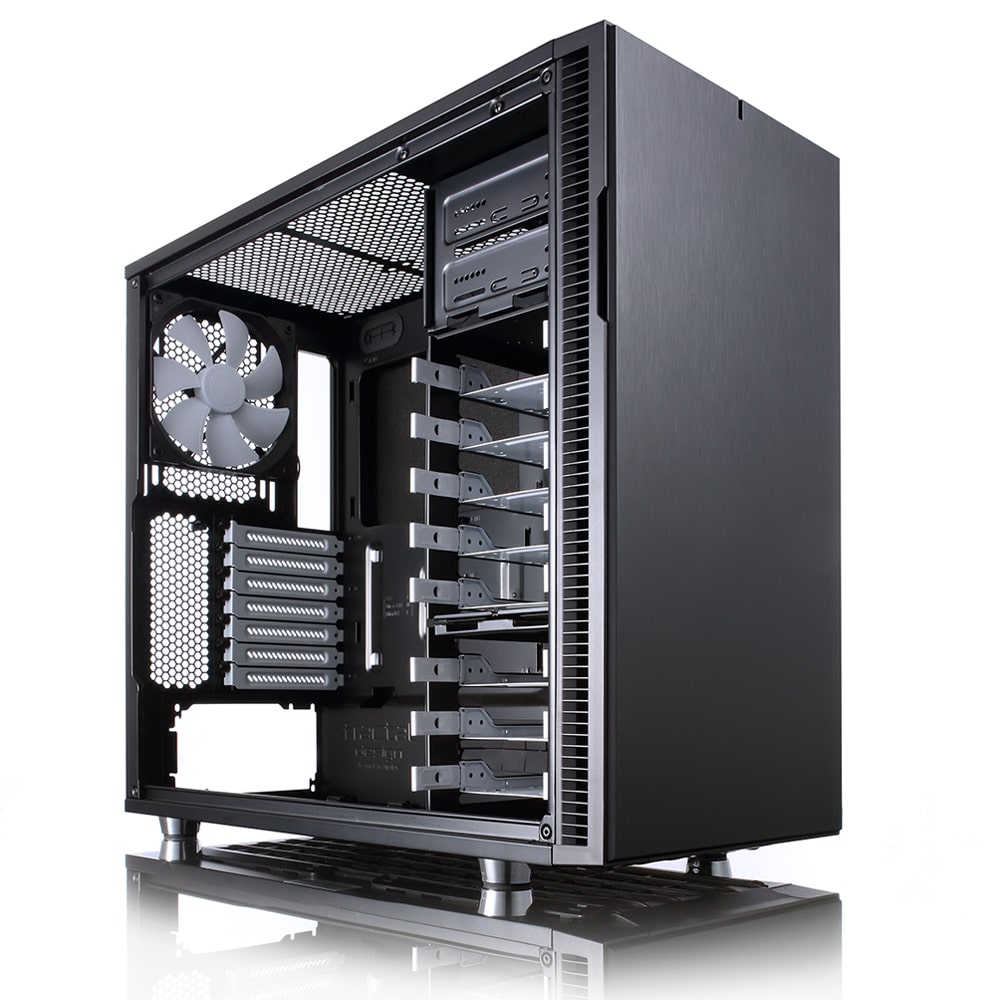
| Case | Fractal Design Define R5 |
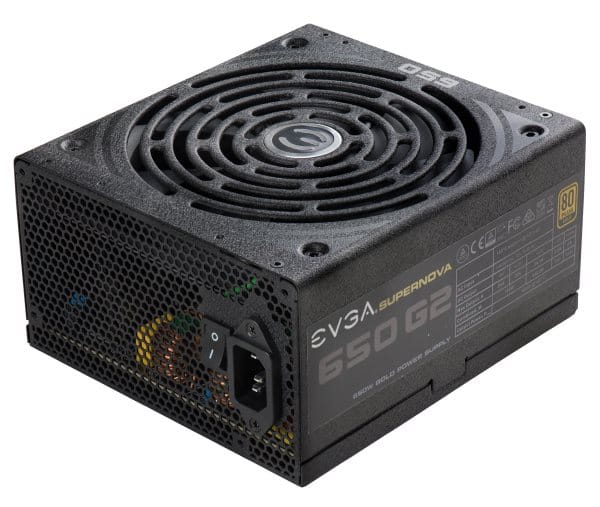
| PSU | EVGA SuperNOVA G2 650W |
| Extras | 1x Cryorig QF120 Balance 1x Fractal Design GP-14 140mm (no optical drive) |
* Michael didn’t feel the need for much storage in the immediate term, and wanted to just re-use an existing SSD then add a hard drive later on when he needed it.
Barring the unusual storage situation, this is basically something I would’ve built for myself.
I believe we initially had an i5 selected for the CPU (since this was a build heavily focused on gaming performance), but ended up with an i7 instead because that was the logical place to improve system performance after the full parts list was laid out. Overclocking was something we had originally planned to do, but Michael got cold feet since it technically voids the warranty on the CPU when doing so. Fortunately the 6700K has moderately higher clocks out of the box compared to the 6700, so at least the extra money spent on the K didn’t end up completely going to waste.

Given the relatively high priority on acoustics (and the initial plan to do some overclocking), a good cooler was a must. I keep a small stockpile of spare parts, and at the time had actually recently bought a second hand Prolimatech Black Megahalems, complete with mounting hardware. This was a flagship cooler back when it was still on the market, so cooling performance would be comparable to buying something new. To save some money I requisitioned that for the build and added a (new) Cryorig QF120 Balance for the fan. Prolimatech coolers actually don’t come with a fan, and my best spare fans were already in use. Without the Megahalems on hand I would’ve gone with a Cryorig H7 anyway, so the fan choice actually ended up being the same. The less common design on the fan’s corners unfortunately proved to be problematic with the fan mounts of the Megahalems – although I’m still unsure if was truly a physical incompatibility or if we were just using an incorrect installation method. Either way, we’ll get to that later.
Since Michael greenlit the priority on acoustics, I definitely wanted to make use of an Asus motherboard for their Fan Xpert software, which is only compatible with Asus boards. Overclocking meant we wanted a board using the Z170 chipset, and features-wise the Asus Z170-AR seemed like the best selection based on our needs.
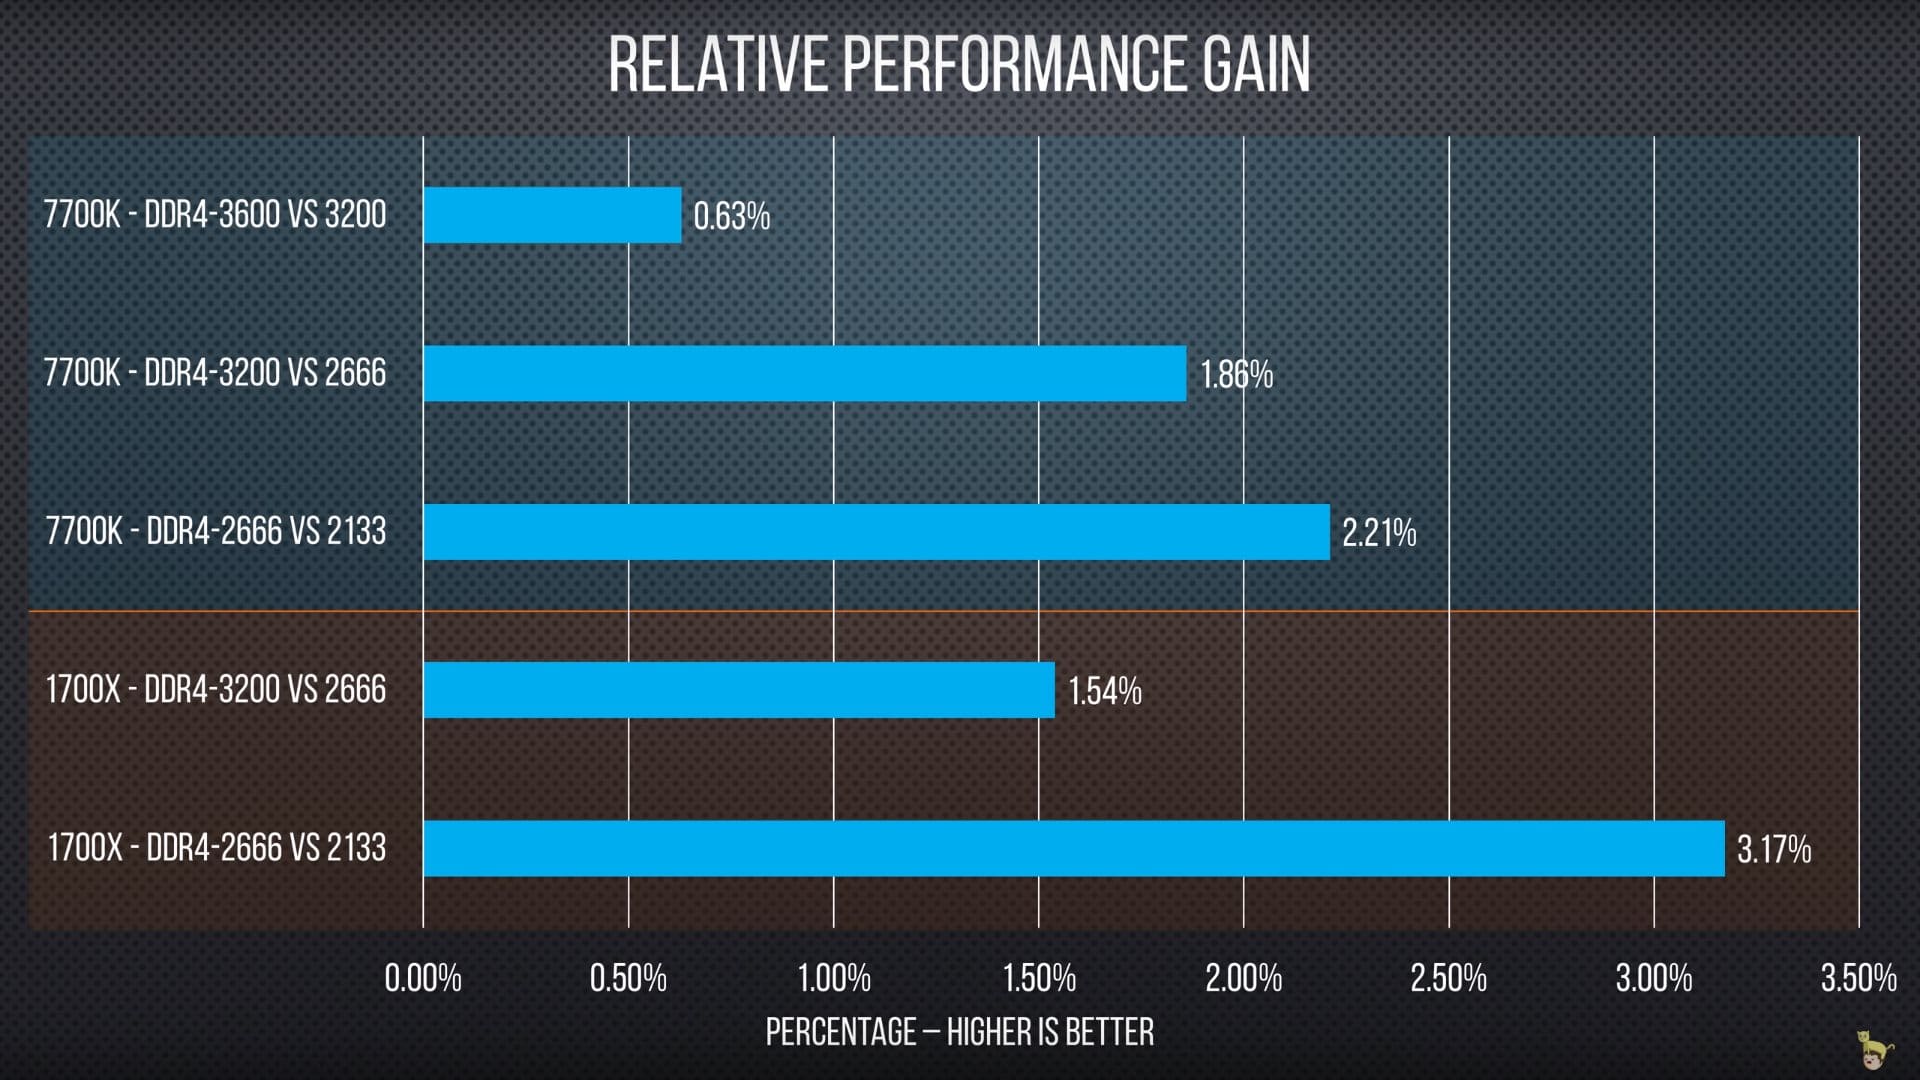
16GB of RAM was the sensible choice for a build at this price point, but unlike with the previously-mentioned Ryzen systems, RAM speed was less of a priority. Intel CPUs do not appear to benefit quite as much from improved speeds, so the value proposition is different. With the pricing at the time, it was unclear if high speed (~3000MHz) RAM would be worthwhile outside of truly high end builds where cost is barely a concern. Searching through PCPartPicker, Scorptec had an ex-demo kit available at an appropriate discount which proved to be the best value option for the build. It still had warranty, so Michael was happy with it. Being a black HyperX Fury kit, it also continued the accidental black and white color scheme we had going on – a fun bonus.
GPU choice was pretty clear, since at the time AMD’s GPU lineup didn’t extend into the upper end of the market unless you went with the awkward R9 Fury X (which was still notably slower than the GTX 1070 anyway) – the choice was simply which 1070 to get. After looking through acoustic testing of a number of cards, it quickly became a tossup between the Asus Strix and MSI Gaming X, which were generally priced about the same. JJ has gone to some length towards making me an Asus fan, but the Gaming X simply had better acoustics at the same or better thermals in each of the reviews which had data for both. The Strix offered some sweet RGB lighting, but after checking with Michael I opted for the card which delivered what we were after: sick lighting best-in-class acoustics. MSI’s Gaming X card was the victor.
Fractal Design’s Define R5 was my immediate case candidate because of SPCR’s honestly-absurd 16.3 dBA result with it. I looked at a few alternatives from other manufacturers, but nothing was a compelling switch. Fractal’s own Define S was the strongest alternative, but Michael was keen to keep the option of an internal optical drive, even if he didn’t get one from the outset. Along with a few other differences, the Define S doesn’t support external 5.25″ drives, so we stuck with the R5. In line with SPCR’s results, an additional front intake fan was added. Originally I had selected a Be Quiet! 140mm fan for the task, but due to lack of stock we switched last minute to simply another Fractal GP-14, the same model which the case already uses.
Finishing off with the power supply, EVGA’s G2 650W was another easy choice. The pricing (in Australia) on G2 models during the later parts of 2016 made them hands down the best picks compared to their competition, and I honestly have no idea why they were so cheap for that time period. They have best-in-class internals / electrical performance, 80+ gold efficiency, a fully modular design, a seven year warranty, and good acoustics including fanless operation at lower loads. Respected PSU reviewer JonnyGURU used terms such as “heavenly”, “better than excellent”, and “terrific” when discussing their performance. They finished their review of this 650W unit with the following:
Do you really need any more reasons to buy one at this point? If so, perhaps you should see a doctor because you may be clinically dead.
Upgrades and Changes Over Time:
As planned, Michael added a 2TB hard drive some time after the build was completed.
User Comments:
How’s the rig going? Has it met your expectations/are you happy with it?
The expectations of the rig was perfect, it does exactly what i needed it to do, I have no issues what so ever in terms of performance or sound etc, Very happy with the set up, the zip ties work great 😀
Is there anything you would change about the build if you were to do it again today?
At the end of the day the only change I would really make would be to install an optical drive because my ps3 died and I lost the ability to use blueray disks to watch movies.
Reflection
I absolutely loved this build. After putting everything together I tweaked the CPU/GPU/case fan speeds and after that nobody in the room could actually make out the sound of the computer over the (quiet) ambient noise in the house, all while the system was running comfortably cool. That’s awesome, and I really hope that this system isn’t the last time I’m able to do it.
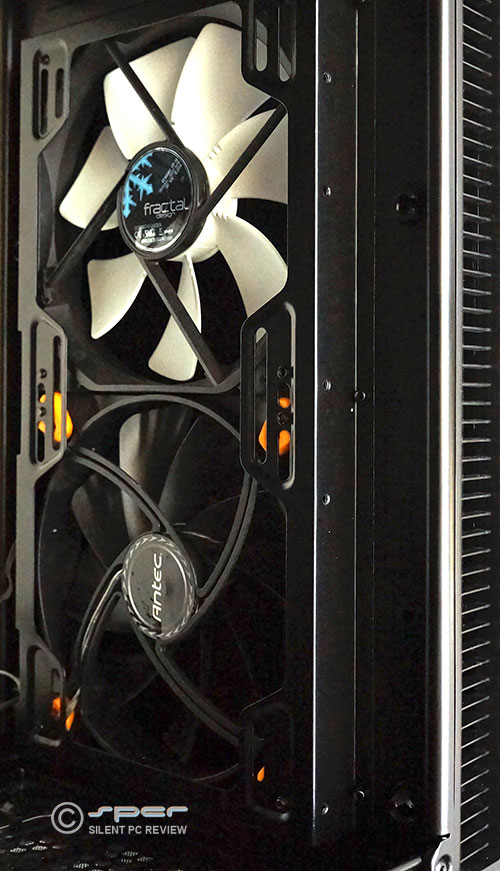
What wasn’t so awesome was the compatibility issue between the mounting clips for the CPU cooler, and the seemingly non-standard corner design which the QF120 uses.
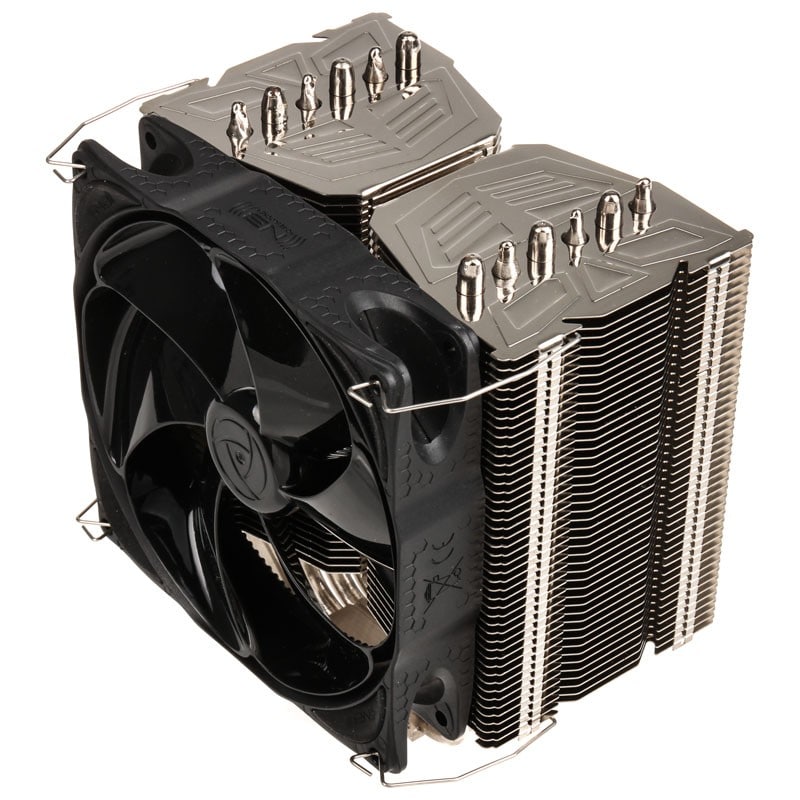
As best as we could tell, the clips didn’t fit the mounting holes on the fans. Bending the metal clips was something we tried unsuccessfully, although with some flat pliers and a lot more patience it’d probably have been doable. Our solution? Zip ties. We literally zip tied the fan to the cooler. Michael’s brother said that the plastic might melt due to the heat, but reality has proven him wrong and the zip tie solution is still going strong to this day. Still, in hindsight it might’ve been better to just get the Cryorig H7 and put the Megahalems to use in a different build. It would’ve cost an extra $35 or so, but the Megahalems is worth at least that much anyway, and doing so would’ve saved us the hassle of discovering the incompatible mounting mechanism. The fact that we’ve got a working solution is great, but it’s not exactly elegant.
I do still wonder whether we were just incorrectly installing the clips though – looking at images like the one above with a fan installed suggest that there’s nothing exceptionally unique about the way the QF120’s corners are designed. One day I’ll take another look at the mounting clips and see if I can get it to work.
Next page: Huan’s Gaming + Dev Machine (March 2016)