Huan’s Gaming + Dev Machine (March 2016)
Build involvement:
- Component selection (assisted)
- Building the system (assisted)
- BIOS configuration (lead)
Priorities:
- Gaming performance
- Dev-task performance
- Graphic rendering (?)
- Not overly wasteful spending
Huan is one of my more technically-knowledgeable friends, so he provided a pretty decent starting point for component selection, and had a better-than-average idea of what kind of performance he was after.
The Build:
| Part | Model |
|---|---|
| CPU | Intel Core i7 6700 |
| CPU cooler | Cooler Master Hyper 212X |
| Motherboard | ASRock Z170 Extreme4 |
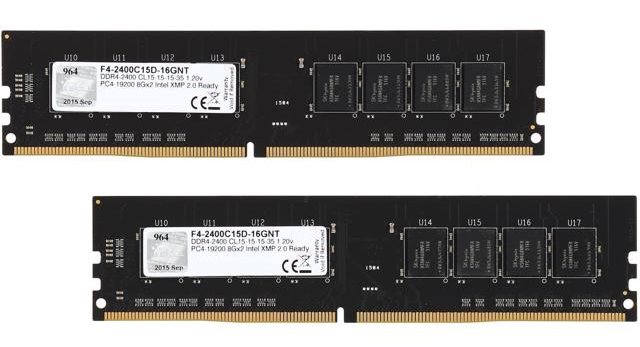
| RAM | G.Skill Value 16GB (2x8GB) DDR4 2400/C15 |
| GPU | Gigabyte GTX 970 4GB G1 Gaming |
| Storage | 1x 120GB 850 EVO 1x 3TB WD Blue* |
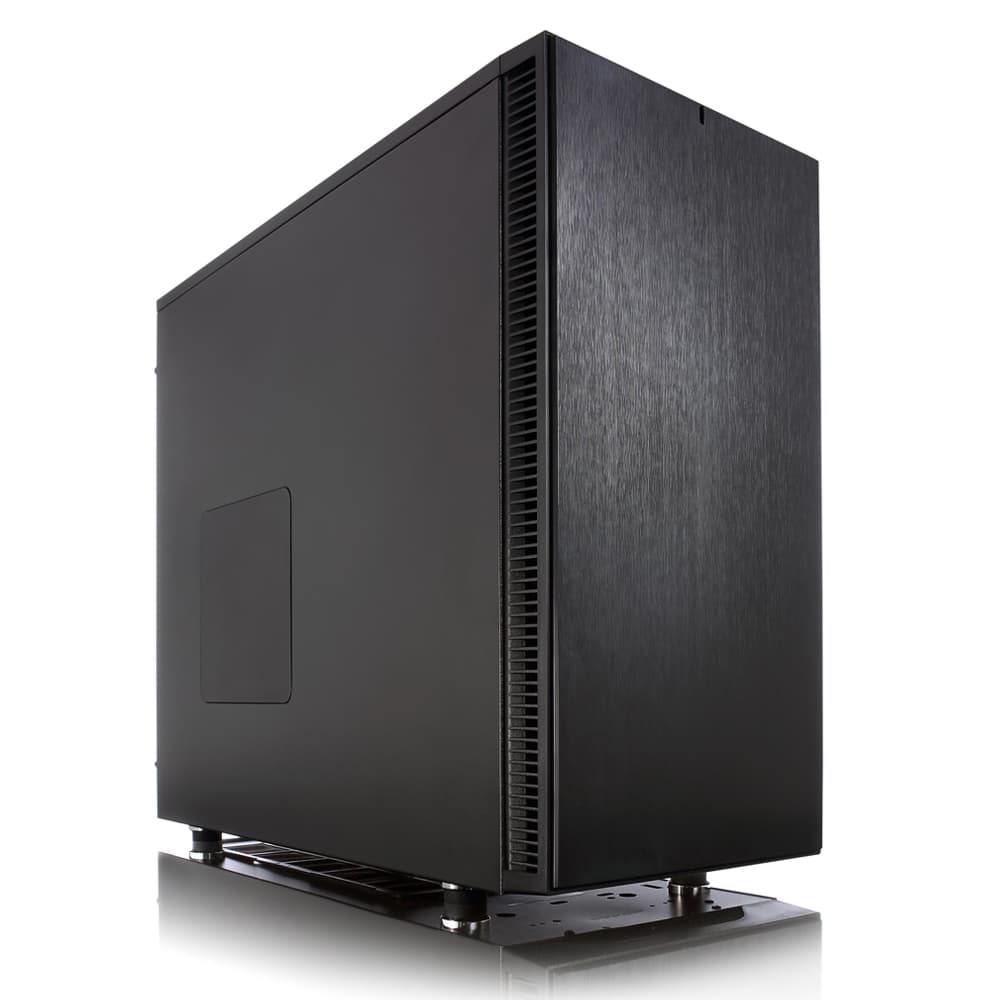
| Case | Fractal Design Define S |
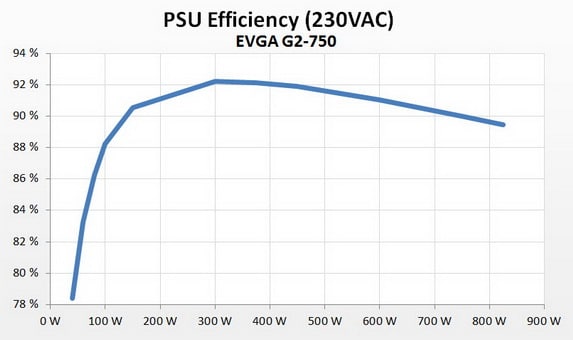
| PSU | EVGA SuperNOVA G2 750W |
| Extras | (no optical drive) |
This was another case of overclocking the CPU initially being the plan, but the plan changing before the build was complete. In this case a non-K part was substituted but the aftermarket cooler and Z-series motherboard were retained. Not the most cost efficient route given that the overclock-supporting parts costed more, but that was what Huan decided to go with.
As for the CPU choice, it was pretty straightforward: the i7 6700 and 6700K were the only higher end CPUs available without getting into the much more costly Broadwell-E chips (e.g. 6800K) and associated X99 platform. During the Skylake era a small case could be made for the atypical gaming performance of the rare Broadwell-based i7 5775C,1 but its average benefit for games was still outweighed by its average deficit in productivity tasks. Since this wasn’t a laser-focused gaming-only system, the 5775C didn’t make as much sense as the higher-availability 6700/6700K.
The previously-mentioned aftermarket cooler was the Cooler Master Hyper 212X. The similarly priced Cryorig H7 would’ve been a better option, as the 212 series was slightly overpriced at the time for unknown reasons. I’m guessing that either the H7 was out of stock at the time of purchase, or Huan was just itching to lock everything in – either way the 212X was what we actually ended up with. Huan seemed to like the idea of good acoustics when I mentioned some example figures, but never went to the trouble of actually tweaking anything in software to achieve that goal. Well tweaked, well tuned fans can be many times quieter than their lesser brethren than linear arithmetic would seem to indicate.2
Motherboard choice is always a bit confusing, with many differentiating features having an unclear or difficult to compare value. Huan opted for the ASRock Z170 Extreme4, which was another relic of the original plan to do some overclocking with a K-series CPU. A Z170 board was more expensive than a similarly specced H170 board, with the biggest difference being the CPU-overclocking support which the Z-based chipsets provide. Since we weren’t going to be doing any overclocking with only a 6700, the pragmatic path would’ve been to change the board choice. Alas, lazy and/or impatient Huan was, so stayed the motherboard did.
16GB of RAM was the default choice here. I assume some development-related tasks might’ve benefited from the bump to 32GB, but Huan was happy with 16GB and he knows more about his own workload. 2400/C15 was roughly the sweet spot for value, and that’s what ended up in the system. This time around G.Skill’s Value series offered the best price-for-spec.
The widely-used GTX 970 made an unsurprising appearance in the build, as it offered performance that was unusually close to the flagship of that GPU generation (the GTX 980 in this case) at a price which destroyed AMD cards at release. Despite the later controversy with its unusual and previously-undisclosed VRAM configuration, the 970 was still a better pick than anything else in that price range despite the quirk. Gigabyte’s G1 Gaming variant was.. an odd pick to make, but once again that’s what Huan ended up choosing. The G1 Gaming nomenclature signaled that this was Gigabyte’s higher end model (in contrast to say, their Windforce range), and the extra performance of decked out GPUs is essentially never worth the price premium attached. One exception would be if acoustics were a priority, but I was never given the impression that they strictly were – and there were other choices that offered as-good or better acoustics for less dough. ¯\_(ツ)_/¯
Storage was only slightly different from the then-default configuration of ~250GB SSD + ~2TB hard drive: Huan went for a smaller 120GB Samsung 850 EVO but a larger 3TB WD Blue.3 He only really wanted to have his OS on the SSD, so the otherwise-cramped capacity was a non-issue. For the past few years Samsung’s 830, 840, and 850 SSDs have been the drives-to-beat and have essentially always been a safe buy. Hard drives are a little boring, with minimal differentiation between brands at the same capacities/price points.

I was very pleased with Huan’s choice of case and power supply: the Fractal Design Define S paired with EVGA’s outstanding SuperNOVA G2 750W. The former is a slightly cheaper variant of the Define R5 with a few minor changes, and much like the R5 it’s an excellent choice for a quiet gaming system. The latter’s capacity was absolutely unnecessary — and I told Huan as much — but he didn’t seem to particularly care:
Yolo
Based on review data from the GTX 970, the system’s power draw would only actually reach around 300W even under full load, which is still below half of the PSU’s output capabilities. Even if you were to factor in later upgrades to the system, there’s realistically no chance that total power draw would go much beyond 500W. The only potential for redemption would be if you wanted to maximise the operating range for the fanless mode, since that range generally extends slightly as you increase the PSU’s capacity. That wasn’t the case here, since Huan explicitly used the always-on mode for the fan instead of the auto-off-at-low-loads mode. The SPCR part of me died a little inside when he did that, and some of the value min-maxer went with it. At least ~300W was within the power supply’s highest-efficiency range, so fortunately the monetary cost of his decision was limited to being upfront, not ongoing.
Upgrades and Changes Over Time:
Other than a change in peripherals, the system’s components have remained the same since assembly.
User Comments:
How’s the rig going? Has it met your expectations/are you happy with it?
Yeah it’s served my purposes well. Mainly dev work, graphic rendering programs (photoshop etc.) and occasional video games.4 The extra potential juice that I missed out on by not choosing a k version of my processor isn’t really missed, as most of my time isn’t really spent in long-running non-interactive tasks (apart from compiling I guess but at my scale we’re talking about single-digit-percentage time savings at best).
Is there anything you would change about the build if you were to do it again today?
Probably take a bit of extra time to get a GPU passthrough system going (Host- Linux, Guest Virtual Machine- Windows w/a dGPU). During the last few years I’ve found myself yearning more and more for a POSIX environment, but at this point I’m too lazy to reset my shit.
Reflection
As far as “clients” go, Huan was probably the least swayed by input from me regarding optimising component selection. See also: most of the parts chosen. But he was the one paying for everything so the only cost to me was emotional distress. 🐙
Putting the parts together was initially pretty straightforward. Before building I had looked up how the mounting for the Hyper 212X worked, and that was probably what we otherwise would’ve had the most trouble with. The stressful part was when the system didn’t boot after we put everything together, and then it still wouldn’t boot after we went back and checked everything was properly in place.
We tried reseating the CPU, clearing CMOS, reseating the RAM, redoing power connections, and isolating system components. Nothing seemed to solve the problem, and I began to worry that one of the parts was legitimately just dead. The angled pins on the motherboard’s CPU socket also had me questioning if we’d somehow managed to bend all the pins while installing the CPU (although in hindsight that’s not the sort of thing you do without realising it). Understandably, Huan and I were a little stressed out, but we kept trying things.

The weird part is, the more times it failed to boot after we change something, the more progress we got. At first the system would just start and then quickly shut down again. Then we started getting error codes on the board’s included LED display to look up in the motherboard’s manual (this would usually be helpful, but even the motherboard didn’t seem to know what the problem was since the displayed error codes would change sometimes). After a stressful period of basically just constantly trying different things, it eventually got to the point where the system booted fine – even though we never actually fixed any apparent issue or specifically addressed the problems that the motherboard error codes told us to in a way that made any sense.
To this day we have no idea what the problem was, but it’s never been an issue since. That was certainly one of my more disconcerting building experiences, but at least the end result was a working system.
Soon™
Part 2 will be up in a couple weeks or so, and will be featuring builds from 2014 and 2015 – if you liked these then you’ll probably like those. The four builds in Part 1 were all roughly upper-mid-range builds that were specced mostly for gaming. The 2015/2014 builds covered a broader set of use cases and budgets, so there was a much larger variance in part selection.
- Interestingly, the result doesn’t seem to be as apparent in some other tests: https://www.anandtech.com/show/9482/intel-broadwell-pt2-overclocking-ipc/4
- http://civilization.wikia.com/wiki/Spartan_Federation_(SMAC)
- This was not long after WD merged the lower-RPM Green drives under the Blue branding, so the drive in question ran at ~5400RPM.
- Pfft, “occasional”