Architecture Student + Light Gaming Build (August 2015)
This build was for a friend who’s requested to remain nameless. They provided a bit of a challenge: provide optimum performance for the demanding 3D work an architecture student does, but do so within the budget of a full-time student paying rent.
Note: it appears that a LOT of links I previously had in this article have vanished, and I don’t really know why. For the most part it won’t matter much, but in a few cases links to key articles may no longer be present. This is unfortunate, but I don’t think it’s worth restoring a backup just for the sake of fixing the links, since as far as a I can tell the content itself is still at least mostly intact.
It’s also worth pointing out that most of this article was actually originally written in 2017, so any references to “today” or “present day” actually mean 2017 unless otherwise specified. Ryzen was still in its first gen, so its IPC was a little sluggish. The different time-eras have made past/present tense a bit of a mess – moreso than it already was, and the quality of writing is a bit of a mess as I’ve created an amalgam of different eras of my own writing and have been more concerned with ensuring the article is released than it being my best work ever produced.
I’ve noticed that 2017-me was also very careful to source every single image even if it qualified for fair use, whereas 2019-me usually can’t be bothered for the low-risk stuff like manufacturer product photos.
Build involvement:
- Component selection (lead)
- Building the system (assisted)
- BIOS configuration (lead)
Priorities:
- Fit within a student’s budget: basically spend as little as possible while still satisfying other priorities
- Provide sufficient 3D performance / render times etc in programs such as Revit and Lumion.
- Light gaming performance (e.g. League of Legends)
- Smaller case / parts if possible
- Dust filtration if possible
Although I’m adequately knowledgeable when it comes to how CPU/RAM/GPU scale with video rendering and encoding, 3D work of this nature was a new category for me. Typically workloads like these also have the luxury of a larger budget as well, which required a few corners to be cut for this build in order to best cater to what was actually needed.
The Build:
| Part | Model |
|---|---|
| CPU | Intel Xeon E3 1241 V3 |
| CPU cooler | Stock |
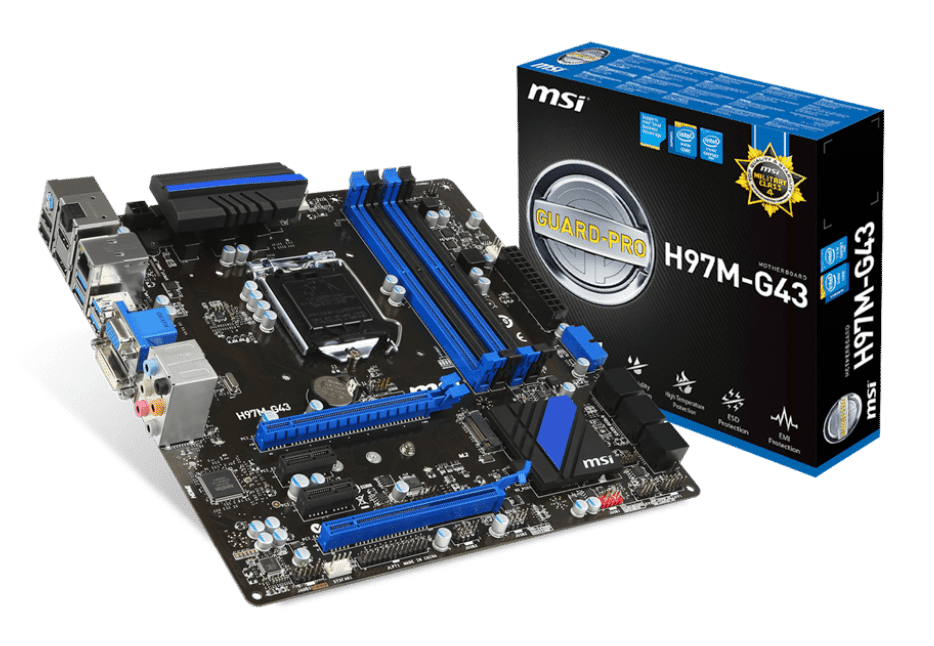
| Motherboard | MSI H97M-G43 |
| RAM | Kingston ValueRAM 16GB (2x8GB) DDR3 1600/C11 |
| GPU | Galax GTX 970 4GB |
| Storage | 1x 250GB Crucial BX100 1x 3TB Seagate Barracuda |
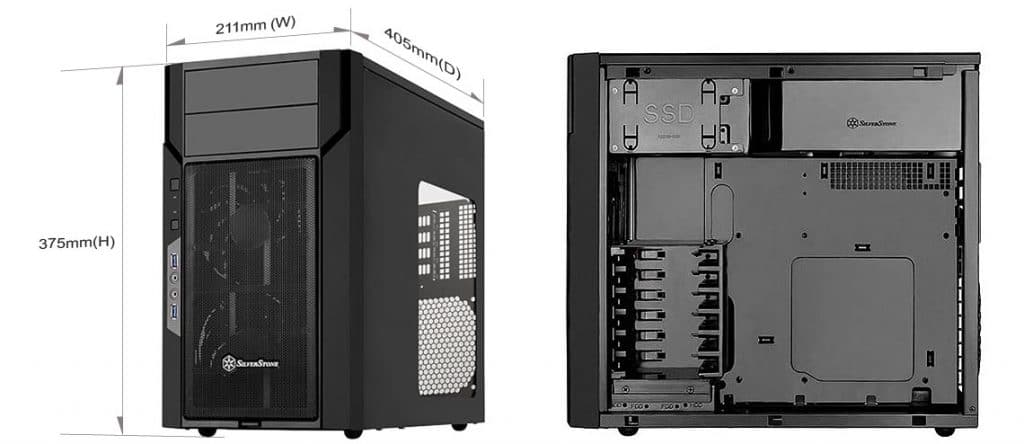
| Case | Silverstone Kublai KL06 |
| PSU | Antec TP-450C |
| Extras | 1x Nexus Real Silent 120mm (not installed) |
Some research on behalf of my friend revealed that their suite of programs called for at least a high end consumer CPU, moderately high RAM (16GB), and a higher end GPU. Given a bottomless pocket I would’ve loved to have gone well beyond just the minimum or close-to-minimum hardware recommendations, but that obviously wasn’t an option given the tight budget constraints.

For the CPU, the logical option was something in the desktop-i7 performance class: any lower would be too weak, and any higher would be too expensive. Luckily for us, we could find some additional cost savings by opting for a Xeon E3 v3 instead of something from the more commonplace Core i7 line.
Haswell Xeons (such as the E3 1241 v3 used in this build) were almost literally just i7s with no integrated graphics, and were consequently selling at a modest discount compared to their i7 equivalents. They used the same underlying processor design and retained the same amount of cores and threads. One place they did differ a little was clockspeeds – generally speaking the Xeons sported somewhat more conservative clocks than the i7 parts. Still, if you compared cost vs performance they still offered the better deal, and we locked in the Xeon choice. A couple other similarly-priced models in the E3 v3 lineup were considered, with the difference between each being the aforementioned clock speeds. With the options explained and the pricing compared, my friend eventually selected the 1241 over the alternatives.
I suppose we got a little lucky with the timing of the build, as this was the last CPU generation were Intel had widely-available, cost-effective consumer Xeons that were clean “i7 replacements”. The generation after this (Broadwell) was almost non-existent in the desktop space, and it was almost immediately pushed aside in favor of Skylake – so much so that some tech publications actually only reviewed Broadwell CPUs at the same time as the newer Skylake parts. As for those newer Xeons, for Skylake Intel decided that consumers getting a good deal simply would not do, and locked compatibility for consumer chipsets (and therefore motherboards). If you wanted a Skylake Xeon in the same product category as the E3 1241 which we used, you’d have to buy the less appealing, and less available motherboards based on the C232 and C236 chipsets.

The price:performance simply didn’t make sense with regards to overclocking and using an aftermarket cooler, so the stock cooler was given the chance to live a long and fulfilling life doing exactly what it was designed to do.
As mentioned earlier, my friend’s program suite seemed to be happy with 16GB of RAM. Less was fine in some cases and questionable in others, but ultimately wouldn’t have provided a significant cost saving so was not seriously considered. More would’ve been better, but getting it would’ve required a downgrade in either CPU or GPU. Doing either of those would completely offset the performance increase of additional RAM and then some, so we stuck with 16GB. Kingston’s 1600/C11 kit proved to have the best pricing at the time of purchase.
Since my friend was interested in having a computer that took up a little less space, an mATX motherboard was prioritised. Since Intel had not yet locked down the Xeon line (i.e. we could use consumer chipsets), and no overclocking was going to happen (i.e. we didn’t need Z series chipsets), we settled on MSI’s H97M-G43. This is one of the lower end boards within the product stacks of the major motherboard manufacturers, but suited our needs just fine. From memory there were a couple of other boards in contention, but they were either more expensive without meaningful benefit, or even more bare-bones for minimal cost savings.
When researching for the GPU selection I did explore workstation cards like Nvidia’ Quadro series and AMD’s FirePro series, but it strongly appeared as though the consumer cards worked just fine for all of the programs my friend would be using.1 Knowing this, the GPU that made sense given both the budget and the performance requirements was the GTX 970. Similarly to the CPU situation, something less powerful would have been risking inadequate performance, but something more powerful was beyond the budget’s reach. At this price point Nvidia was really killing it with the 970 vs anything from AMD, and professional applications tend to better support for Nvidia cards as well.
A GPU with more VRAM would have been preferable, as Lumion suggested using a card with 6GB+ for higher complexity scenes. Unfortunately that simply wasn’t possible given the budget, but at least the 970’s 4GB was still deemed fine for “moderately complex scenes”.2
Since price:performance was such a high priority, the luxury of a nice cooler for the GPU was not an option. On my search and discover mission for the cheapest 970, I uncovered the most budget-looking cooler on a modern high-end GPU I’ve ever seen: Galax’s cheapest variant of the GTX 970.
This is so cheap that it doesn’t even use Nvidia’s normal reference cooler. To satisfy my own curiosity I did some digging, and from what I found I want to say that it’s actually a recycled GTX 760 cooler bolted onto a GTX 970. According to the spec sheet, the card even comes out of the factory with a 1 MHz underclock. I triple checked that one.
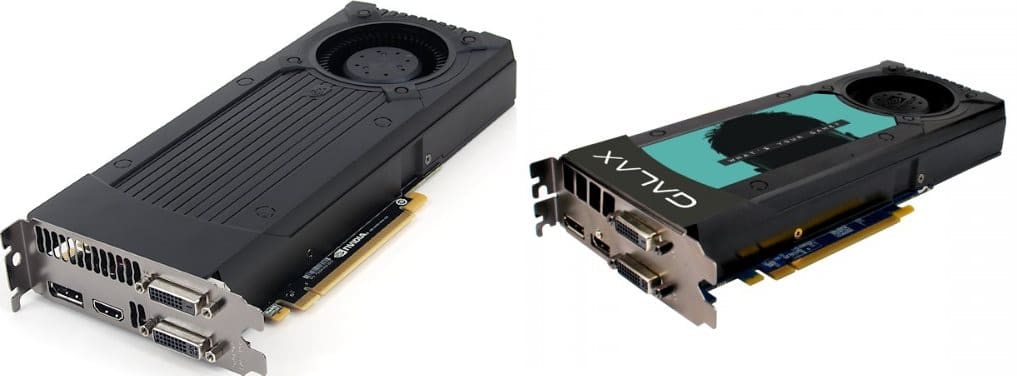
I found these quirks nothing short of bizarre, but they’re fortunately much more dumbfounding than actually dumb. This choice saved us a few bucks compared to every other available 970, so we bought it. Still hilarious though.
Storage was similar to the default configuration for builds in this price category, although we were a little more value conscious on the SSD selection and were after a bit more total storage than the baseline of 2TB. The end result was a 250GB Crucial BX100 paired with a 3TB Seagate Barracuda. The BX100 was hard to touch for value, offering performance not too far off something like the Samsung 840 EVO but at a somewhat lower price point.
Case selection was more limited than I had anticipated, as it seems that good budget enclosures are more often in the ATX form factor, but we were hoping to make use of an mATX case to make the system take up less space. After digging through some reviews of the available models, it was primarily a tossup between the Cooler Master N200 and the Silverstone Kublai KL06. Both seemed to be well reviewed mATX options with a couple of included 120mm fans. The primary differences between the two which we cared about were price and dust filtration. The N200 was over $20 cheaper but lacked dust filtration on the front intake, whereas the more expensive KL06 did provide filtration.
Value-wise the N200 was undeniably the better pick, and included dust-filtration shouldn’t cost $20 for a budget enclosure. However, my friend claimed the computer’s surrounding environment was “pretty dusty”, so the value of a dust filter was inflated a little. They opted for the KL06.
In reality, aftermarket dust filters exist, and you can also make your own janky versions with pantyhose, medical gauze, or other similar materials. Counterpoint is that the former can be difficult to source and the latter can be more difficult to clean than a rigid filter. In any case (pun optional), it wasn’t an extreme cost sink, and did offer some benefit.
For the PSU, I took a bit of a gamble, but one I was confident in. We wanted a good quality unit with decent efficiency to power the system, but didn’t want to sink extra cash into a higher-than-necessary-capacity unit. Total system power consumption under load with a 970 was expected to be a little under 300W, so we didn’t need anything high capacity. Modularity was also not a concern given the budget’s focus. I found an Antec unit of not-completely-clear model available at a brick-and-mortar store which, based on context such as Antec’s product line, I had strong reason to believe was actually the TP-450C. If it was indeed the TP-450C, that was our best option and quite a bit cheaper than anything else available that ticked the same boxes. It’s worth noting that it’s not as though this model is a standout in reviews – it actually has none that I could or can find. Even today, the closest I can locate is still JonnyGURU’s review of the Antec True Power Classic 750, which is presumably the TP-750C and in the same series as the TP-450C.
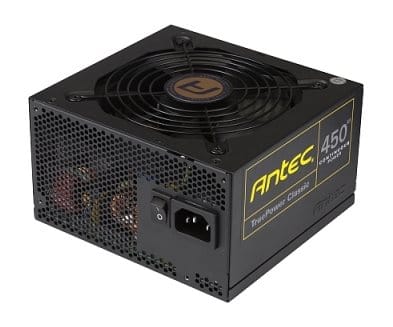
Antec has a good track record of making not-terrible PSUs though, and I was pretty confident about being right with regards to the mysterious model number listed by the store. My friend went to the shop to investigate/grab the PSU, and it was indeed the TP-450C. Score: 1-0 me vs unclear PSU models.
Upgrades and Changes Over Time:
A spare Nexus 120mm fan was donated to the system to slightly improve airflow. It has yet to be installed as of writing this article. This fact causes me sadness. As far as I know, no other changes have been made to the system.
User Comments:
How’s the rig going? Has it met your expectations/are you happy with it?
Good, meets my expectations in terms of general use, haven’t had any issues. I probably had too high expectations of it though in terms of program performance (expecting cad programs to load instantly is pretty unrealistic and not a hardware performance thing).
Is there anything you would change about the build if you were to do it again today?
Nope, I’m still incredibly happy with it.
Reflection
This is the closest build I’ve done to a true workstation, and it was interesting to do so within the confines of a student’s budget. We were able to cut a few corners with minimal “real” cost, and were fortunate to be able to take advantage of Intel’s Xeon E3 v3 lineup before they neutered it in later Xeon E3 generations. All in all I’m also happy with how the build turned out, and am grateful for the unending amusement with Galax gave me with their take on the GTX 970.3
Given that I’d never previously done any builds focused on 3D design work, I was a little worried that I would end up putting something together that didn’t quite hit the mark. Fortunately I was able to make up for lack of experience with a healthy double dose of research during component selection, and my friend ended up with something that was very close to best-in-class in performance vs cost.
- The biggest actual difference was official support – if you got an officially supported Quadro card, you could give customer support a yell and they’d be much more likely to help you than if you were using an unofficially supported GeForce card, for example.
- Or perhaps more accurately, its 3.5GB with an extra 500MB of what was basically “slow as hell but still a bit faster than using system memory”.
- I’m also not trying to say “don’t buy Galax!1!!11! – I actually bought a cheap GTX 1060 3GB from them and don’t regret my purchase given the price I got it at. They’re just not my first choice most of the time, and I still don’t really understand their use of a probably-GTX-760-cooler lol.