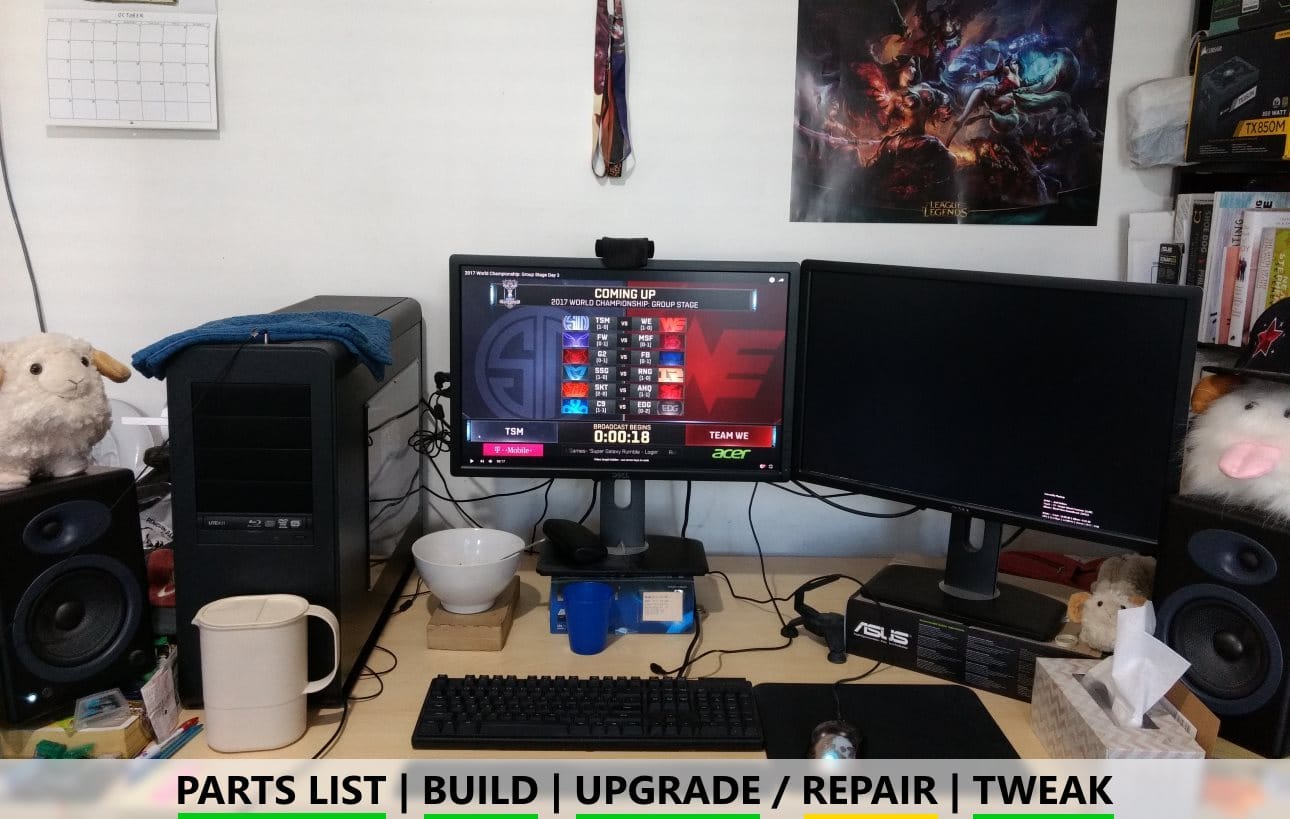
My personal rig (April 2013)
Build involvement:
- Component selection
- Building the system
- BIOS / drivers / software
- Upgrades / repairs
- Tweaking
Given that this is my own build, I naturally had full authority with complete autonomy.
Most of this section was written in 2017, but I’ve added a few 2019 notes and indicated them as such. The result is a few steps removed from a dumpster fire of words, but it does appear just coherent enough to understand.
Priorities:
- Not getting any choices “wrong” in the short-to-medium term
- Good acoustics
- Flexibility (can you upgrade X without having to change Y?)
- Longevity of parts where practical, not going too expensive where not
It might not seem like it, but my build had much more stringent needs than most builds I’ve helped with. Since I’m both the user and the part-picker for this build, I can offer deeper insight on the judgement calls made when choosing the parts. Obviously since I’ve been the person using it all the time for over 4 years,1 I’m also intimately familiar with how it’s held up during that time.
The Build:
| Part | Model |
|---|---|
| CPU | Intel Core i5 3570K |
| CPU cooler | Cooler Master TPC 812 |
| Motherboard | Asus P8Z77-V PRO |
| RAM | G.Skill Ares 16GB (2x8GB) DDR3 1866/C10 |
| GPU | Asus GTX 660 DirectCU II 2GB OC |
| Storage | 1x Samsung 840 Pro 256GB 2x WD Red 3TB |
| Case | Silverstone FT02B-W (the updated version with USB 3 and AP fans) |
| PSU | Corsair AX760 |
| Extras | 1x Lite-On IHS312 3x Nexus Real Silent 120mm 1x Arctic Cooling MX-4 1x Asus Xonar Essence STX |
Parts for this build were chosen very risk-aversely – perhaps moreso than any other build I’ve done since. I was in a position where I could not reasonably expect to be able to replace anything for at least a few years unless it actually failed, which meant every part absolutely had to do its job and I couldn’t afford to pick anything that was “the wrong choice”. It’s not that my budget was extremely low, but political capital with my parents was expended in its entirety on this purchase – any followup purchases to it were predicted to be excruciating.
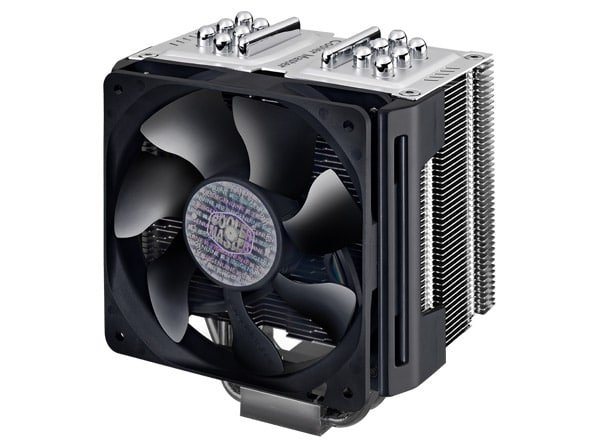
That risk-aversion is reflected all over the component choices. To start with, I wasn’t confident in how much video work I was going to be doing, so I didn’t put in the extra $100 for an i7’s hyper-threading (and I was also cognizant of there being an uncommon issue with some legacy games and hyper-threading).23That freed up that money to be spent in other areas were I was confident the money would be put to use. “Risk averse” would tend to imply no overclocking, but I (correctly) possessed a high degree of confidence that overclocking risk was minimal if it was done correctly – a position that had close to negative support within my family. To support my overclocking endeavors, I went with the fairly expensive TPC 812 from Cooler Master, with its unusual hybrid heat pipe + vapor chamber configuration. Straight up, this choice was not the best for the price, but the lack of end-caps on typical heat pipe designs are just kind of ugly to me. The Vapor Chamber tech used here is a minor innovation I suppose, but the performance wasn’t improved vs other flagship coolers of the era – it just looked slicker.
As for the GPU, I didn’t need anything beyond a mid range card – at the time I didn’t play new releases, instead playing undemanding games like League, or titles that were at least a few years old by the time I got to them like Half Life 2. Staying clear of higher end cards also gave more thermal headroom, in turn giving acoustic headroom.
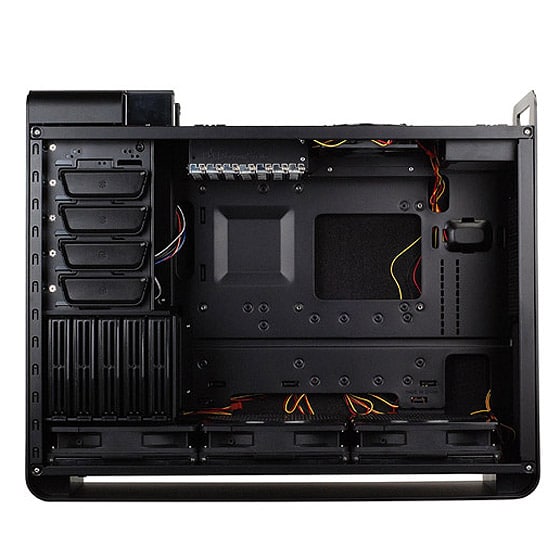
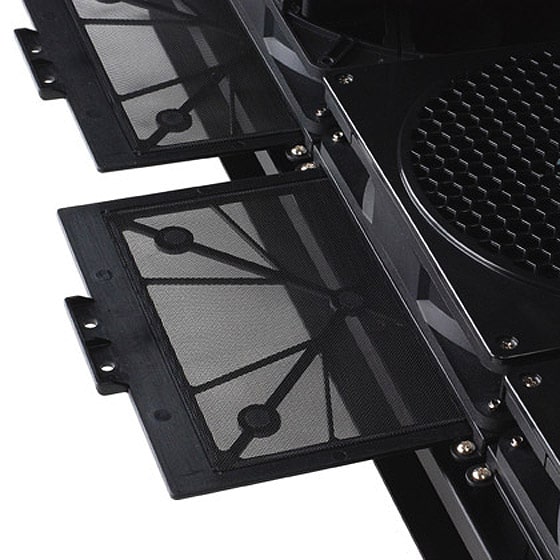
Even though I only went with a GTX 660, I still wanted extremely high flexibility for future upgrades. Fermi was still fresh in my mind (the Nvidia architecture infamous for “being able to cook an egg”), so I went for a case+PSU combination that could handle power hogs if necessary. Corsair’s AX760 had enough available power output to comfortably feed a couple of ~250W GPUs, plus an overclocked CPU alongside other system components, and Seasonic (Corsair’s OEM for the design) did a great job with the internals based on reviews. Cooling power hungry hardware without resorting to jet-engines-for-fans required a well designed case, and the rotated layout and three filtered 180mm intake fans of the Silverstone Fortress 2 meant it could handle the task. I also greatly appreciated that the rotated design avoided (or at least reduced) issues of “GPU sag”, where the heavy heatsink of a GPU causes the entire card to sag downwards in the PCIe slot under its own weight. With how hot / power hungry cards were in the Fermi era, this was an increasing concern.
With storage, I paid a little extra for a Samsung 840 Pro instead of an 840 EVO – TLC was still somewhat new and questions remained about long term durability.4 I also spent a little extra for WD Reds instead of WD Greens. Reds had longer warranties with arguably slightly better internals, while also probably avoiding the infamous aggressive head-parking issue that plagued WD Greens.5 Higher-than-average storage capacity was the result of wanting to record LoL games, and keeping those recordings archived for future use.6 I also wanted to protect against single-drive failure by having a local backup of everything, which meant two high capacity drives instead of just one.78
The motherboard and RAM chosen are a notch above the “default tier” for an upper-mid-range build with a 3570K and GTX 660. Asus at the time had (barring niche Intel-made boards) unrivaled fan control software exclusively available for their motherboards (FanXpert2). Speedfan was a viable alternative, but was less user friendly and in itself had some minor issues with support on new motherboards.9 The P8Z77-V ticked the boxes but lacked enough fan headers to natively control all four fans of the FT02, so I went with the P8Z77-V PRO instead. As for RAM, 8GB was normal for a gaming-focused build, but video editing and rabid multi-tasking (aka having too many things open simultaneously) greatly favored the jump to 16GB. Speed-wise, it was more common to go for 1600/C10 at this price bracket, but the Ares kit wasn’t too pricey. It was also a nice-looking low profile kit, which was less common at the time. 1600 -> 1866 at comparable latency might show up as a one or two percent difference on a productivity benchmark, which was approximately in line with the small cost difference, and enough to not make me feel too bad about buying it for mostly aesthetic reasons.
As mentioned already, another factor that affected component choices significantly was acoustics. I wanted something that would run quietly, particularly with my previous machine being frustratingly loud despite only being a mid range machine. Armed with knowledge from SPCR, I grabbed 3 Nexus 120mm fans to replace the single included CPU cooler fan and the case exhaust fan – the third fan was to give the CPU cooler a push-pull configuration. I avoided 7200RPM hard drives, and went with a PSU that had a passive fan mode at lower loads. Despite its cooling potential, SPCR’s look at the revised version of the FT02 showed that it could house powerful hardware and still be tuned to run well at around 25~26dBA@1m. Compared to newer acoustically-optimised cases like the Fractal R5, this result is mediocre (16.3dBA@1m after fine tuning!), but it was top tier at the time, and is still not bad compared to most cases these days.1011 For reference, sub-30dBA@1m is still lower than the noise floor which many general-hardware publications test at.12
The Xonar STX (~$200 AUD) is certainly not a common pick for my use case, but I was getting a bit into “decent audio” at this stage, having previously picked up a pair of the famous Audio Technica AD700s on sale, and later upgraded to the AD900Xs a couple years later (which I’m still using). In a parallel universe I would have bought a Xonar DG (~$40) or DGX (~$50) a year before everything else, stuck that in my existing computer, then moved it over when I upgraded. That never panned out, so I wanted to go for something that would still be useful later down the track, a position which the STX satisfies. If nothing else, the STX is good enough that I’ll probably only replace it in the foreseeable future if I have unresolvable driver problems. Given that I’m using 3rd party drivers with it and that I’ve previously done some “light hacking”13 to make a Xonar U3 work with a different computer, it seems I’ll be wed with the STX for some time.
Since this is my personal rig, I also did purchasing of the peripherals:
| Part | Model |
|---|---|
| Monitor(s) | 2x Dell U2412M (1920x1200 IPS) |
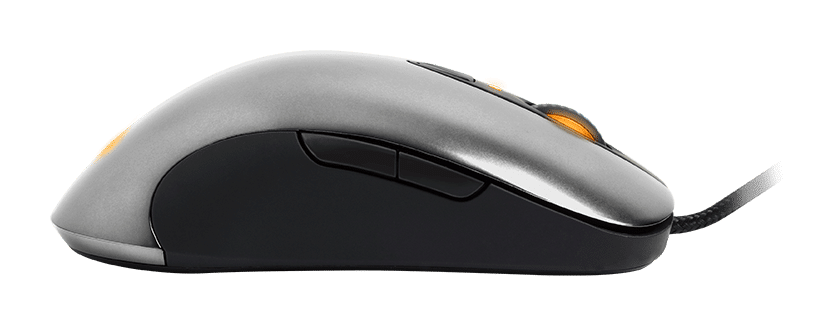
| Mouse | SteelSeries Sensei |
| Mouse Pad | SteelSeries 9HD |
| Keyboard | Max Keyboard Nighthawk X8 (MX Browns) |
| Webcam | Logitech C920 |
| Extras | Roccat Apuri 2x Antec Halo 6 |
The biggest point of contention here is the mouse – it’s by no means a favorite among purists, due to the sensor having some (generally minor) acceleration issues. I basically just needed something with a similar shape to what I was used to (again with the risk-aversion), and the SteelSeries Sensei fit the bill, despite its slight acceleration leaving a black mark on it. The mousepad choice was made for similar reasons: I was used to using a mouse on a hard surface and didn’t want to gamble on a soft pad without the ability to try it out extensively before putting money down. SteelSeries’ hard pads seemed to be generally considered decent, and there were bonus risk-aversion points for having the mouse and mousepad from the same manufacturer (“surely they wouldn’t release something that was absolutely awful when combined with their existing product line”).
TFT Central had a favorable review of the U2412M as a budget all-rounder in the rather specific “16:10 and better-than-TFT-panel” category, and according them it “should be perfectly fine for some most [sic] moderate to high gaming”. I suppose 16:9 wouldn’t have been an outright deal breaker, but I was used to 16:10 from my previous ViewSonic VX2235wm (1680×1050) and the extra vertical space is nice for productivity (like when writing articles!).
Cherry MX Browns and the C920 have enough of a reputation that they don’t require much justification, although not many readers are probably aware of Max Keyboard. Honestly neither was I, but this was on sale and it fit my criteria for the keyboard (backlight + MX browns + known-decent manufacturer). Reviews of the keyboard and opinions of the manufacturer were favorable, so I was happy to save a few bucks for seemingly no downside compared to alternatives – the included wrist rest was a definite plus too. The C920 is high-end as far as webcams go, but is still not that expensive for a single component. It performs better than its cheaper peers in poorly lit environments, but actually doesn’t handle properly lit scenes as well as you might expect it to. Fortunately I wasn’t expecting to be recording in a suitably “studio lit” environment, so it fit the bill just fine.
The Antec Halo 6 is a step away from Antec’s usual line of products: it’s an LED strip that attaches to the back of a monitor. Supposedly having the extra light on the wall behind your monitor(s) can reduce eye strain / eye fatigue and improve the perceived image quality. Reviews were mostly positive about its effects, even if they were considered to be somewhat mild. They weren’t dirt cheap, but also weren’t an expensive addition. The study where my computer lives can be a bit dim, especially on my side of the room where my desk is, furthest away from the windows. Given those factors, I was willing to give these a shot.14
The Apuri was a slightly expensive solution to wanting a mouse bungee and also extra USB ports (given that I knew my motherboard wouldn’t have many spares). Being able to power the ports with an included external power supply was a big plus, although this was another area where I knew I was splurging a little – I just didn’t have any easy alternatives that were as elegant in their execution.
Upgrades and Changes Over Time:
The bulk of the system’s hardware is more-or-less the same as when I first put the system together, but there are a few things of note. Jokes on 2017-me: almost the entire system is different as of 2019. So I’ll keep the 2017 notes and then add more notes from 2019 below it so you get a cohesive narrative.
2017:
Starting with the internals, I unfortunately had to remove one of the Nexus 120mm fans from the CPU cooler, stranding the lone fan in a pull configuration instead of the initial push-pull configuration. I knew going into the build that the sleeve-bearings of these fans would have preferred a vertical layout instead of the horizontal layout which they were forced to live in, and it seems that one of the three fans paid the price. It didn’t die, but the ticking noise it developed only a year or two into its life completely negated its otherwise favorable acoustics. Some time afterwards I was able to find the fan a new (and vertical) home in a friend’s system.
Later on I swapped the surviving CPU cooler fan for a Cryorig QF120 Balance. This swap was a combination of Fan Xpert 2 seeming to not appreciate having a 3-pin on the CPU cooler, and hot summer days requiring the case fans to spin up a little louder than I’d like to keep the CPU at reasonable temperature, mostly due to the low top speed of the Nexus.15 The remaining 120mm fan is still serving admirably as a near-silent exhaust fan.
In late 2016 I added a couple of additional 3TB Red drives, essentially doubling the media storage capacity of the machine. The need for this has a frustrating root: I had a “critical system process” which enjoyed idling at 30+% CPU all the time.16 Among other things, that means I couldn’t use x264 recordings at my desired resolution and frame rate without dropping or duplicating frames. In the end I started using Quick Sync for recordings to work around the problem, but that meant bumping up file sizes to achieve the same level of quality I was shooting for. The price of liberty may be eternal vigilance, but the cost of quality is evidently large hard drives if your Windows installation is sucking CPU cycles for no clear reason.
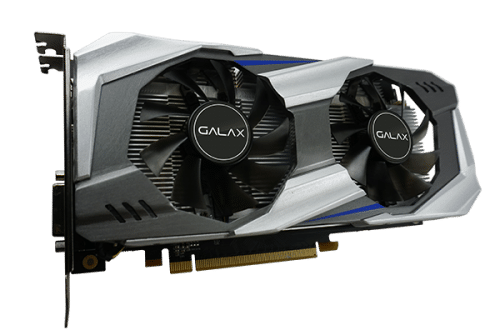
Towards the end of 2017 I was able to find a GTX 1060 3GB at a great price, so figured I’d jump on it. I’d been looking for a cost-efficient upgrade for some time, and the timing was especially good because my sister’s HD 6950 had been slowly dying for the past couple of months (exhibiting increasingly common artifacts). Getting a new GPU meant I could pass my GTX 660 to her and resolve that problem without crippling the performance of the system by using the integrated graphics on her CPU. Around the same time as this I leapt up a 1TB Samsung 850 EVO, freeing my existing 840 Pro for another build that would benefit from the inclusion of an SSD. That might seem like a strange reason to drop ~$400, but I’d been set on getting a drive in the 750GB-1TB region the next time I upgraded my system anyway, so the big-picture cost of buying it a little early was negligible.
Peripherals-wise, it turns out I couldn’t count to five on my hand: surprisingly, plugging a computer, two monitors, and a pair of speakers into a 4-port power board meant that there was no room for the Apuri’s power supply. Despite losing the powered USB ports, I’ve still been using it as a bungee, but I would describe the grip as “approaching awful” and the weight as “too light for what you’re asking it to do”. To my genuine surprise, both of these are actually areas where the Apuri is supposed to beat most of its peers according to basically every comparison and review I’ve seen/read. I’m pretty sure my unit isn’t defective, so either I expect way too much from mouse bungees, or most of them kind of suck a bit. ¯\_(ツ)_/¯ I could get a larger power board to resolve the Apuri’s lack of power, but currently have just enough USB ports with my current configuration so haven’t felt the need to do so just yet.
Other than a couple of mousepad changes (9HD -> 4HD -> Dex), the rest of the core peripherals are still the same as they were in April 2013. I did make changes to some of the (external) audio equipment, but I consider audio gear to be somewhat independent from the rest of the system. In any case, I added a pair of Audioengine A5+’s not longer after putting the system together, and somewhere along the way added some Xiaomi Hybrid Duals, but I think everything else I use was bought before the system was.
2019:
At this point I’ve changed the CPU, CPU cooler, motherboard, RAM, GPU (again), and mouse. My Xiaomi Hybrid Duals also half-broke (no audio on left side), so those are basically out of the picture. The only things remaining other than storage (SSD / HDDs / ODD) as far as internals go are the case + PSU (exactly as I planned, so great job past-me), and sound card (excellent work past-me!!).
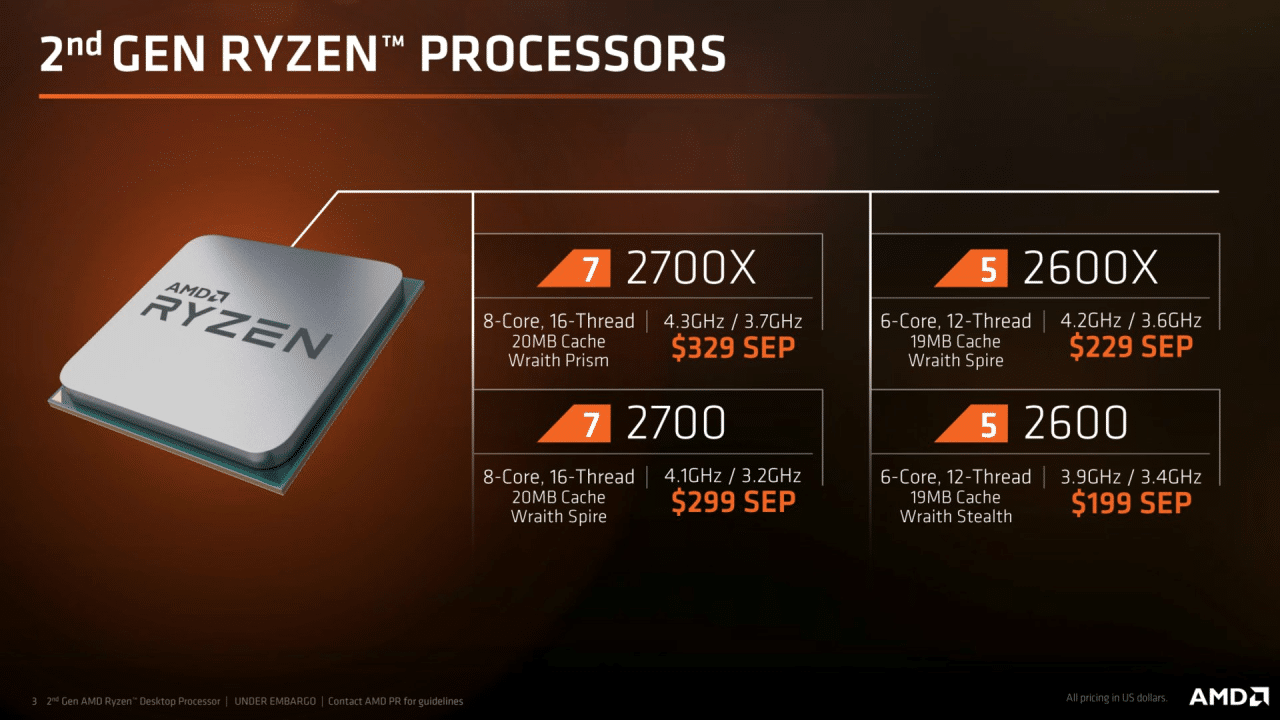
I’m now using an overclocked Ryzen 2700 cooled by a Cryorig H7 Plus. This has helped with video editing, rendering, and encoding immensely, although truth be told I wish I had even more CPU power (I’d love a fast 16C/32T (or higher!!) for my next upgrade).
Those parts live on an Asus Prime X370-PRO (which I got heavily discounted due to being a previous-gen board) supported by a sideclocked G.Skill Ripjaws V 32GB kit. The sticks are rated at 3200/16-18-18, but after my 100 hours in troubleshooting hell where over a week of my life was eat-sleep-troubleshoot, the best I could run them at stably was 3133/16-17-17-30-1T (the latter two being an improvement over the rated spec).
Instead of the Galax GTX 1060 3GB, I now have a Gigabyte GTX 1070 8GB, secondhand from myself, as it came from a secondary machine. The acoustics are a further down downgrade from the 1060 (which was itself worse than the 660 before it) and it has some issues with electrical noise which picks up in recordings under some circumstances, but it’s powerful enough that I’m set for a while now — unless I upgrade to a higher refresh rate or resolution, at least.
In the biggest personal tragedy of my build, I actually damaged the right click on my venerable Sensei, and although I was initially able to fix it up for a while and use it without issue for at least a few weeks after the fact, transporting it to a friend’s house to LAN broke it again – and I was never able to replicate the fix for more than a few hours at at time. Part of the tragedy is because I broke it due to raging in LoL – the first and only time (over what must be tens of thousands of hours of combined gaming time across all games) I have ever gotten so frustrated as to damage hardware. I’m not proud of that moment, and the Sensei paid the price for it.
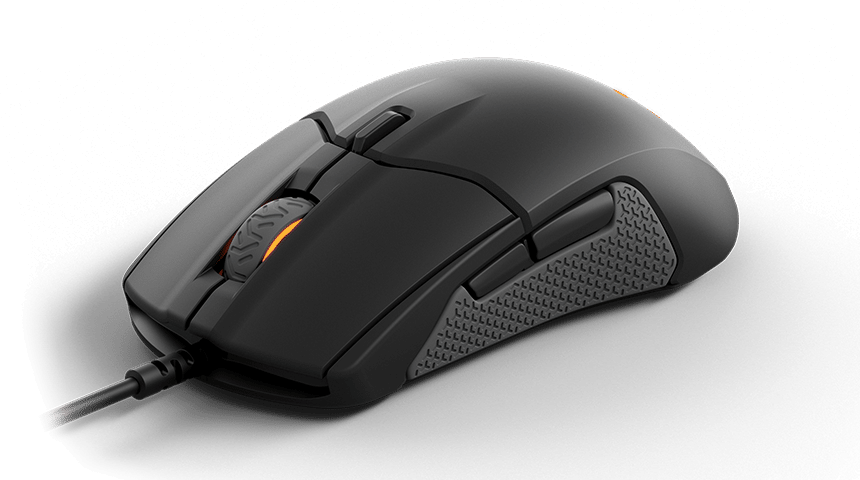
To replace it I ended up with the Sensei 310, the successor to the original Sensei. It’s fine but I’m not really attached to it, and find its flaws quite frustrating. The side grips seem moronic to me,19 It does have a better sensor though (not that I seem to be able to tell the difference), and the new left and right click design is generally an upgrade – although I could definitely spam-click faster with the old design (which has been a hit to my cookie production, but otherwise unimportant).
One difference that I found bizarre between the two mice is that identical lighting settings in the same software look completely different to the human eye on them. Emulating the gentle blue glow on my Sensei required significant adjustments to the RGB settings on the 310. Not sure why that’s the case.
(thus ends the 2019-explicit section)
Reflection and User Comments:
All in all, I think 2013-me I did a pretty good job balancing performance, risk aversion, and acoustics. Some of the parts are still fairly good even by today’s standards (like the case and PSU), and the main “guts” of the system are great for hand-me-downs to friends and family. As previously mentioned, I’ve re-purposed the SSD and my sister’s currently using the GTX 660. When it comes time to upgrade the core of my system, she’ll no doubt end up with a nice bump up from her existing i5 2400 to a hot-clocked 3570K.20
Although the decision made sense given my requirements at the time, the choice to go for the 3570K instead of the 3770K has made video editing and rendering needlessly slow and tedious – although I’m definitely blaming that random Intel-NIC-related software bug for somehow managing to steal a third of the CPU and making the problem go from tolerable to actually frustrating / untenable.21 Even game recording has required unpleasant concessions that could have been avoided if I had just ponied up. Oh well, hindsight is a chance to learn, and it’s hard to regret something that made sense at the time.22
Despite the CPU issue(s), the system has performed admirably overall, and with a single GPU upgrade has remained relevant performance-wise.23 Part of that could be blamed on Intel’s stagnation in the CPU market, but either way I’m glad the system has met the future-expectations of past-me. Considering I solidified the gist of the system when I was around 15, I’m honestly very proud of the result. Not many people can say they threw down 2k on something they really wanted when they were 15 and it turned out exactly as they had hoped by the time they reached their early 20s.
Although the system is generally adequate, I am still looking forward to upgrading to something like second-gen Ryzen to help with video work. Intel getting off their ass with Coffee Lake’s release (and rumors of an 8-core in the next generation or two) is also interesting If I have the budget for it when I upgrade.24
I’m also keen to repurpose the FT02 for something else when I have spare funds (I’ve been thinking about putting together a NAS for some time) so that I can use a more modern case design to reduce noise and improve cable management. If I do end up going the NAS route that would also further improve the system’s acoustics since there would no longer be so many hard drives droning on inside.25
- (now 6 years)
- 5 years later I really wish I hadn’t tried to save money here, but I guess 5 years is a pretty good run for a system anyway.
- 2017-me would probably be quite happy to know that I ended up with an 8C/16 Ryzen 2700 since initially writing the previous note.
- These days (2017) a few independent long-term tests have been conducted on the long-term durability of SSDs, so the use of TLC is no longer a concern for end users.
- In most cases the fix for it was easy enough to do by following instructions online, but at the time 1) Some people had issues with the fix 2) I wasn’t comfortable with it because it appeared to not be 100% successful.
- 2019 note: this was before replays existed, despite Riot’s promises well before then.
- Before you go yelling at me, yes, I’m aware of 3-2-1 / the rule of three. There’s unfortunately no cost-efficient solution to having 3 copies of 2TB of data if your upload speed is god awful.
- 2019: With not-god-awful upload speeds I now do have the option of more backup options, but have yet to fully implement any. The amount of data I would prefer to have backed up includes quite a lot of video files, making some options a little pricey. Privacy also has become a larger concern, particularly knowing that any poorly secured backup could potentially be a life-long security / privacy risk if that data was sensitive.
- 2019: Ironically I ended up using Speedfan later on due to issues with FanXpert2. I don’t know whether Speedfan supported my motherboard at time of purchase or if support was added later, but it worked pretty well on my board by the time I used it.
- One time a friend of mine came over and was surprised that the computer was actually on. Given that I don’t consider my computer to be by any means “silent”, I was quite amused by this.
- 2019: I think that’s still true today, although certainly I’m glad acoustics have improved even further since 2017 on mainstream cases.
- See the acoustics section on case reviews – usually there’ll be a noise floor stated either there or on a dedicated methodology page.
- Modifying an .ini file :P
- 2019: for those curious I don’t think I regret the purchase for the price, although I do find the lights slightly too cold (blue) to always use, and the adhesive has had to be replaced by a generous amount of tape because it didn’t stay stuck on long-term.
- In hindsight, I could probably have just added an additional CPU fan and restored the original push-pull configuration. I ended up finally returning to a push-pull configuration during May 2018 – in part because I eventually migrated from Fan Xpert 2 to SpeedFan.
- The process wasn’t an issue if booting in safe mode, so after troubleshooting / researching quite a few things, and being quite fed up with losing one third of my processing power, I manually killed off every single running service one by one to identify the problem. Even after recklessly ignoring “dude this might break stuff” popups, the problem persisted. Years later I eventually discovered that something related to the Intel NIC in the system didn’t function correctly specifically on Windows 8.1, causing the CPU usage issues.
- They’re LESS GRIPPY than the old design despite my old Sensei being quite worn down on its rubber grips, but the new grips are less comfortable and track an OBSCENE amount of gunk from your hands due to their patterned design-_-17 and the altered side button placement is a regression compared to the original Sensei.18Both myself and Rocket Jump Ninja find that the right-side side buttons (as a right-handed user) can be easily pressed more easily, and accidental presses are obviously REALLY NOT GOOD for competitive playing.
- 2019 note: this has since happened, which is quite simply wonderful to see given how little confidence other people had in my thoughtfully-planned ideas back in 2013.
- Even though I did eventually track this problem down and fix it, having an inconsistent process for recording and using recordings was a drag on workflow efficiency, not to mention video quality.
- 2019 note: again, Ryzen baybeeee
- 2019 note: obviously much more has been upgraded in the system since 2017 when I wrote this line.
- 2019: nice I got exactly what I said I was interested in 2 years ago.
- 2019: this is actually something I’m still interested in doing, although to truly get the acoustics levels I want I would probably need to upgrade other parts as well, since the leap up to the 2700 + 1070 actually pushed my acoustics up to merely “average”.